Difference between revisions of "OS.bee UI Designer"
(→Placeholders within the perspectives) |
(→Create new Perspective) |
||
| (19 intermediate revisions by the same user not shown) | |||
| Line 36: | Line 36: | ||
* Providing an implementation for the IDesignerService interface. This service enables components to register a listener in order to be notified about the current mode of the designer (enabled or disabled). | * Providing an implementation for the IDesignerService interface. This service enables components to register a listener in order to be notified about the current mode of the designer (enabled or disabled). | ||
* Activation of SelectedUiElementMarker in order to apply the CSS style “osbee-designer-active-selection” to the selected element. Thus, it is possible to display to the user which model element is currently worked upon. The following picture shows the blue border that has been drawn by SelectedUiElementMarker. | * Activation of SelectedUiElementMarker in order to apply the CSS style “osbee-designer-active-selection” to the selected element. Thus, it is possible to display to the user which model element is currently worked upon. The following picture shows the blue border that has been drawn by SelectedUiElementMarker. | ||
| − | [[File:02_SelectedUIElementMarker.png | + | [[File:02_SelectedUIElementMarker.png]] |
* Providing an IECViewEmbeddableFactory. This factory is used in drag-and-drop operations in order to create ECView elements. | * Providing an IECViewEmbeddableFactory. This factory is used in drag-and-drop operations in order to create ECView elements. | ||
| Line 52: | Line 52: | ||
Afterwards, the Designer Area has to be attached to all perspectives. For auto-generated perspectives, an appropriate placeholder is added automatically (see the following picture). | Afterwards, the Designer Area has to be attached to all perspectives. For auto-generated perspectives, an appropriate placeholder is added automatically (see the following picture). | ||
| + | |||
[[File:04_Placeholder.png]] | [[File:04_Placeholder.png]] | ||
| Line 57: | Line 58: | ||
Finally, menu entries have to be created in order to be able to activate and control the designer. | Finally, menu entries have to be created in order to be able to activate and control the designer. | ||
| − | [[File:05_Menu_for_activating_design_mode.png | + | |
| + | [[File:05_Menu_for_activating_design_mode.png]] | ||
==== DesignerOverlayExtension==== | ==== DesignerOverlayExtension==== | ||
The DesignerOverlayExtension is a Vaadin extension that attaches an overlay to every “extended” component. This overlay is configured by the IWidgetDesignConfigurator. The implementation is located in the repository “org.eclipse.osbp.vaadin.addons” in the “org.eclipse.osbp.vaadin.addons.designer.overlay” bundle. The following picture shows the DesignerOverlay. | The DesignerOverlayExtension is a Vaadin extension that attaches an overlay to every “extended” component. This overlay is configured by the IWidgetDesignConfigurator. The implementation is located in the repository “org.eclipse.osbp.vaadin.addons” in the “org.eclipse.osbp.vaadin.addons.designer.overlay” bundle. The following picture shows the DesignerOverlay. | ||
| − | [[File:06_DesignerOverlay.png | + | |
| + | [[File:06_DesignerOverlay.png]] | ||
Using the DesignerOverlay, changes to the e4 model can be performed much more efficiently since one click is enough to set various UI properties. | Using the DesignerOverlay, changes to the e4 model can be performed much more efficiently since one click is enough to set various UI properties. | ||
| Line 74: | Line 77: | ||
First, the designer has to be activated via the menu bar: | First, the designer has to be activated via the menu bar: | ||
| − | [[File:07_ActivateDesigner_menu.png | + | |
| + | [[File:07_ActivateDesigner_menu.png]] | ||
==== Create new Perspective ==== | ==== Create new Perspective ==== | ||
The menu action “new Perspective” opens the dialog displayed below. | The menu action “new Perspective” opens the dialog displayed below. | ||
| − | [[File:08_CreateNewPerspective.png| | + | |
| + | [[File:08_CreateNewPerspective.png|300px]] | ||
Choose a name, an icon and a template (currently, only a “default template” is available; additional templates may be contributed via the IPerspectiveLayoutProvider API). | Choose a name, an icon and a template (currently, only a “default template” is available; additional templates may be contributed via the IPerspectiveLayoutProvider API). | ||
| Line 87: | Line 92: | ||
The “bike” perspective has been created -- only the layout is defined though, no content is present at this point. | The “bike” perspective has been created -- only the layout is defined though, no content is present at this point. | ||
| − | [[File:09_AddingContent.png| | + | |
| + | [[File:09_AddingContent.png|800px]] | ||
Content can be added using the DesignOverlays described above. | Content can be added using the DesignOverlays described above. | ||
| Line 94: | Line 100: | ||
Keeping the “Alt” key pressed, click anywhere within the “Listpart” area. The DesignerOverlay is displayed. Select “Properties”, and a dialog appears: | Keeping the “Alt” key pressed, click anywhere within the “Listpart” area. The DesignerOverlay is displayed. Select “Properties”, and a dialog appears: | ||
| + | |||
[[File:10_AddingContent_table.png|600px]] | [[File:10_AddingContent_table.png|600px]] | ||
| Line 100: | Line 107: | ||
===== Report ===== | ===== Report ===== | ||
Change to the UI part “Detail” and repeat the above steps until the dialog is displayed. | Change to the UI part “Detail” and repeat the above steps until the dialog is displayed. | ||
| − | [[File:11_AddingContent_report.png| | + | |
| + | [[File:11_AddingContent_report.png|400px]] | ||
Apply the settings shown in the screenshot above and press “Accept”: A report is displayed. | Apply the settings shown in the screenshot above and press “Accept”: A report is displayed. | ||
Finally, the tab “Report” can be moved below the table part via drag and drop, which leads to the following result: | Finally, the tab “Report” can be moved below the table part via drag and drop, which leads to the following result: | ||
| + | |||
[[File:12_AddingContent_report_finish.png|600px]] | [[File:12_AddingContent_report_finish.png|600px]] | ||
| Line 121: | Line 130: | ||
This file can now be merged inot the Xtext perspective model automatically. In order to achieve this, the model files in the preferences under OSGP CSV2App have to be maintained. | This file can now be merged inot the Xtext perspective model automatically. In order to achieve this, the model files in the preferences under OSGP CSV2App have to be maintained. | ||
Right-click on the file “org.osbee.perspective.Bike.mperspective” and select “Convert to OSBP Perspective Model”. | Right-click on the file “org.osbee.perspective.Bike.mperspective” and select “Convert to OSBP Perspective Model”. | ||
| − | [[File:13_export.png| | + | |
| + | [[File:13_export.png|300px]] | ||
After this click, “org.osbee.perspective.Bike.mperspective” is merged to the Xtext perspective model. | After this click, “org.osbee.perspective.Bike.mperspective” is merged to the Xtext perspective model. | ||
Latest revision as of 19:04, 23 October 2017
OS.bee UI Designer
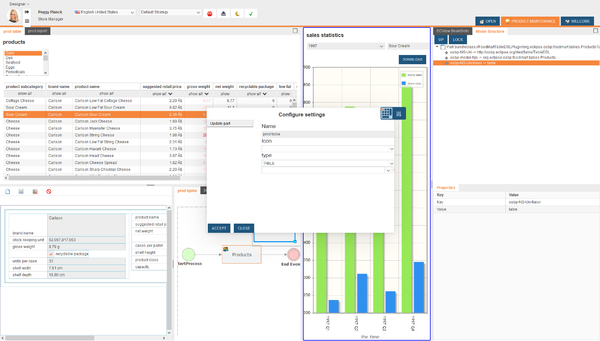
Customize the user interface of the application during design time as well as during runtime, if required.
Activated users get the ability to customize their perspectives during runtime using any browser, independently and individually.
The UI designer is seemless integrated in the OS.bee Software Factory as soon as it is installed.
The task of UI Designer is the creation of perspectives based on a “running” OSBP web application.
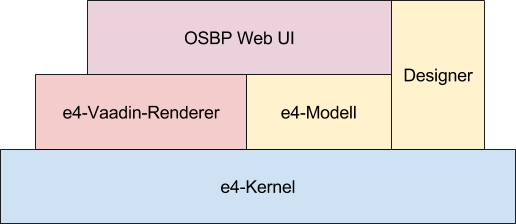
In Vaaclipse, a perspective is described by its Application.e4xmi model (“e4 model” in short). This model is rendered at the startup of a new web session. Additionally, the renderer registers so-called EventHandlers that monitor the e4 model of the active web session for changes (and update the web UI whenever necessary).
The following picture displays the architecture:
The UI Designer interacts with this architecture by modifying existing e4 models and/or creating new ones. It offers commands, menus and UI actions that allow for changes and customizations to the e4 model.
Furthermore, the UI Designer supports the various models occurring in the OSBP (such as table, grid, dialog, report etc. models) as content sources for the UI parts.
Bundles
The bundle for the UI Designer is called net.osbee.vaaclipse.designer.
Configuration
In order to make use of the UI Designer, the bundle “net.osbee.vaaclipse.designer” has to be added to the “.product” definition of the project in question.
Subsequently, the addon “net.osbee.vaaclipse.designer.addon.DesignerAddon” has to be activated in the e4 model. This addon provides the necessary preconditions for using the UI Designer.
DesignerAddon
The DesignerAddon is responsible for the following:
- Providing an implementation for the IDesignerService interface. This service enables components to register a listener in order to be notified about the current mode of the designer (enabled or disabled).
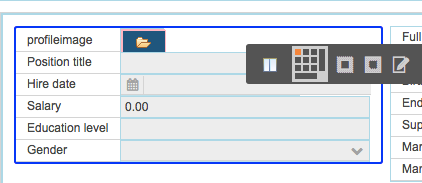
- Activation of SelectedUiElementMarker in order to apply the CSS style “osbee-designer-active-selection” to the selected element. Thus, it is possible to display to the user which model element is currently worked upon. The following picture shows the blue border that has been drawn by SelectedUiElementMarker.
- Providing an IECViewEmbeddableFactory. This factory is used in drag-and-drop operations in order to create ECView elements.
- Providing an IWidgetDesignConfigurator. This class registers and configures the DesignerOverlayExtension and adds it to the Vaadin component. Additionally, this class handles callbacks whenever actions are clicked in the DesignerOverlay.
Designer Area in the e4 modell
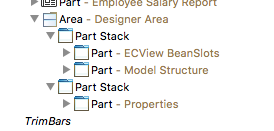
Furthermore, an area for the designer has to be created in the e4 model.
This area contains all parts for the designer (see the following picture).
Placeholders within the perspectives
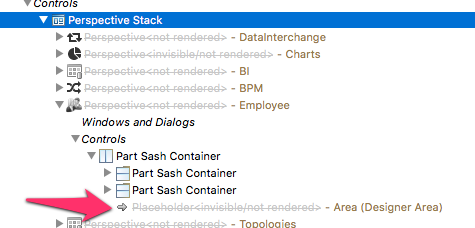
Afterwards, the Designer Area has to be attached to all perspectives. For auto-generated perspectives, an appropriate placeholder is added automatically (see the following picture).
Designer Menu Items
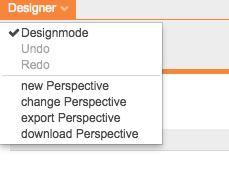
Finally, menu entries have to be created in order to be able to activate and control the designer.
DesignerOverlayExtension
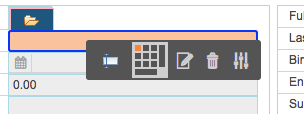
The DesignerOverlayExtension is a Vaadin extension that attaches an overlay to every “extended” component. This overlay is configured by the IWidgetDesignConfigurator. The implementation is located in the repository “org.eclipse.osbp.vaadin.addons” in the “org.eclipse.osbp.vaadin.addons.designer.overlay” bundle. The following picture shows the DesignerOverlay.
Using the DesignerOverlay, changes to the e4 model can be performed much more efficiently since one click is enough to set various UI properties.
Detailed information can be found in the JavaDoc of the DesignerOverlayExtension
Usage
Using the UI Designer has been made as easy as possible. In this example, we will create a new perspective and export it to the Xtext perspective model.
Activate Designer
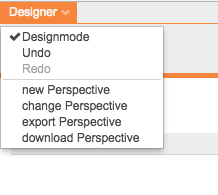
First, the designer has to be activated via the menu bar:
Create new Perspective
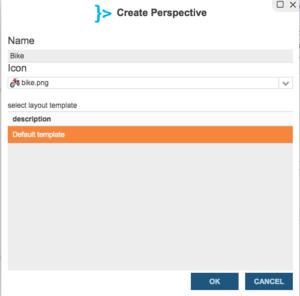
The menu action “new Perspective” opens the dialog displayed below.
Choose a name, an icon and a template (currently, only a “default template” is available; additional templates may be contributed via the IPerspectiveLayoutProvider API). Click OK.
Adding Content (example)
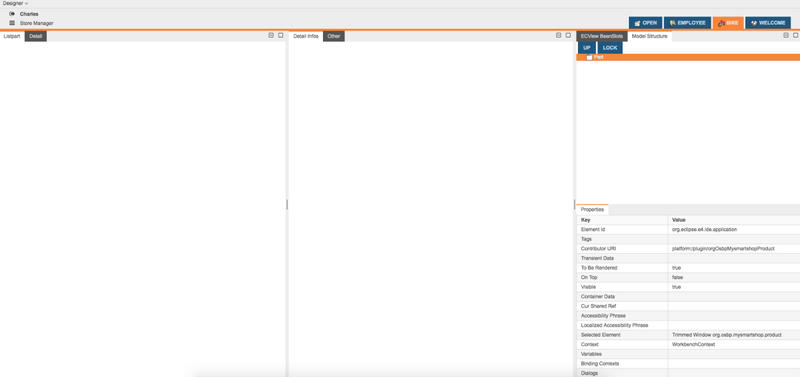
The “bike” perspective has been created -- only the layout is defined though, no content is present at this point.
Content can be added using the DesignOverlays described above.
Table
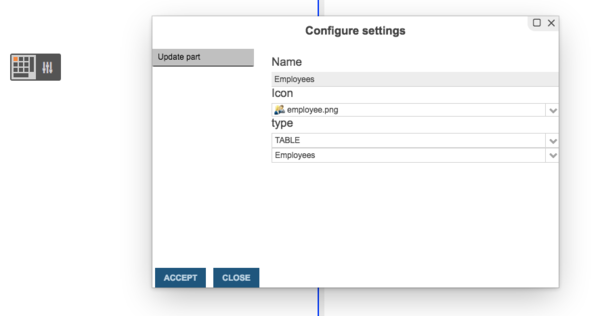
Keeping the “Alt” key pressed, click anywhere within the “Listpart” area. The DesignerOverlay is displayed. Select “Properties”, and a dialog appears:
Activate “Update part” in this dialog and apply the settings shown in the screenshot above. By clicking “Accept”, the e4 model is updated, and the “Employees” table is added to the UI.
Report
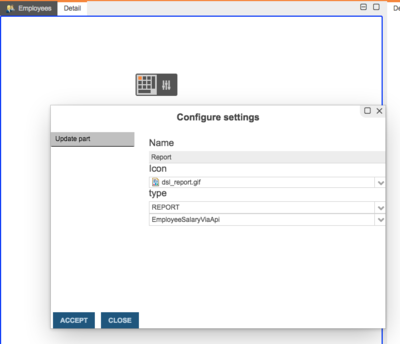
Change to the UI part “Detail” and repeat the above steps until the dialog is displayed.
Apply the settings shown in the screenshot above and press “Accept”: A report is displayed.
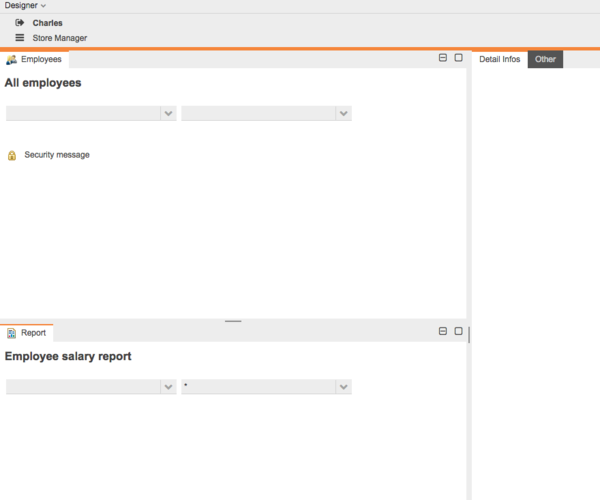
Finally, the tab “Report” can be moved below the table part via drag and drop, which leads to the following result:
In order to customize the two remaining parts “Detail Infos” and “Other”, proceed as above.
Exporting Perspectives
When exporting a perspective, it is important to set the property “-DdebugOwnerWorkspaceLocation={git}/foodmart-models” in the “.product” configuration of the project (“{git}” is a placeholder for the path to the git repository).
This path will be used during the export in order to select a target directory in the OSBP.
Select the action “Export perspective” in the menu and select a target directory (preferably, in parallel to the Xtext perspective model). After clicking “Accept”, the file is exported.
In the IDE, select the folder where the perspective has been exported to and hit F5 for refresh. After the refresh, the exported file is visible (in our case, “org.osbee.perspective.Bike.mperspective”).
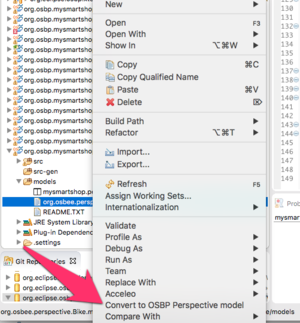
This file can now be merged inot the Xtext perspective model automatically. In order to achieve this, the model files in the preferences under OSGP CSV2App have to be maintained. Right-click on the file “org.osbee.perspective.Bike.mperspective” and select “Convert to OSBP Perspective Model”.
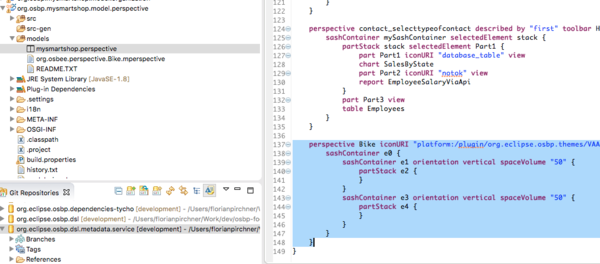
After this click, “org.osbee.perspective.Bike.mperspective” is merged to the Xtext perspective model.
Opening the Xtext perspective model shows the new model content that has been automatically added:
Copyright Notice
All rights are reserved by Compex Systemhaus GmbH. In particular, duplications, translations, microfilming, saving and processing in electronic systems are protected by copyright. Use of this manual is only authorized with the permission of Compex Systemhaus GmbH. Infringements of the law shall be punished in accordance with civil and penal laws. We have taken utmost care in putting together texts and images. Nevertheless, the possibility of errors cannot be completely ruled out. The Figures and information in this manual are only given as approximations unless expressly indicated as binding. Amendments to the manual due to amendments to the standard software remain reserved. Please note that the latest amendments to the manual can be accessed through our helpdesk at any time. The contractually agreed regulations of the licensing and maintenance of the standard software shall apply with regard to liability for any errors in the documentation. Guarantees, particularly guarantees of quality or durability can only be assumed for the manual insofar as its quality or durability are expressly stipulated as guaranteed. If you would like to make a suggestion, the Compex Team would be very pleased to hear from you.
(c) 2016-2026 Compex Systemhaus GmbH
