Difference between revisions of "Peripheral Devices"
From OS.bee documentation
| Line 5: | Line 5: | ||
* Install the ADK | * Install the ADK | ||
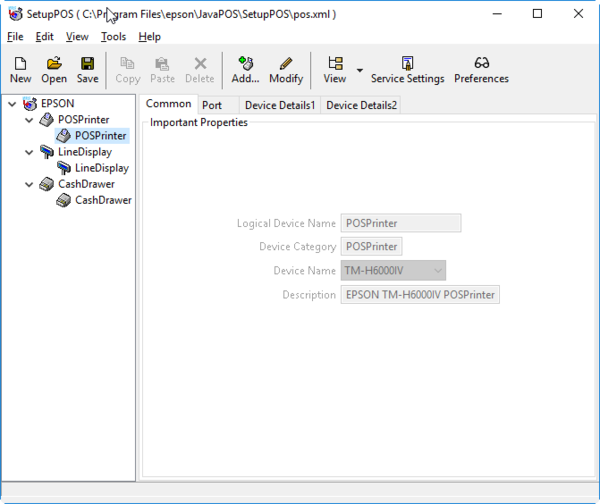
* From the start menu launch SetupPos and configure the physical hardware according to the Epson manuals | * From the start menu launch SetupPos and configure the physical hardware according to the Epson manuals | ||
| − | [[File:EpsonSetupPOS. | + | [[File:EpsonSetupPOS.png|600px]]<br><br> |
* Save the configuration and note the path to the configuration file | * Save the configuration and note the path to the configuration file | ||
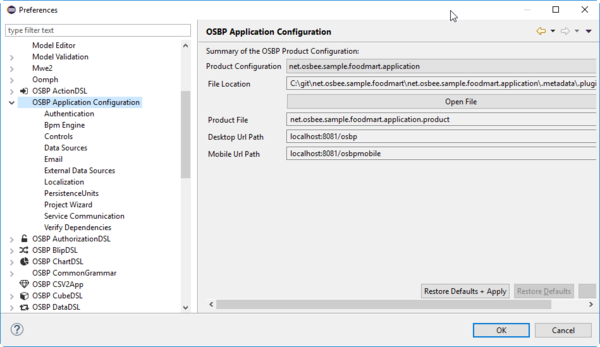
* In Eclipse open Window->Preferences->OSBP Application Configuration | * In Eclipse open Window->Preferences->OSBP Application Configuration | ||
* Select the product to be configured in the field Product Configuration | * Select the product to be configured in the field Product Configuration | ||
| − | [[File:ProductConfiguration1. | + | [[File:ProductConfiguration1.png|600px]]<br><br> |
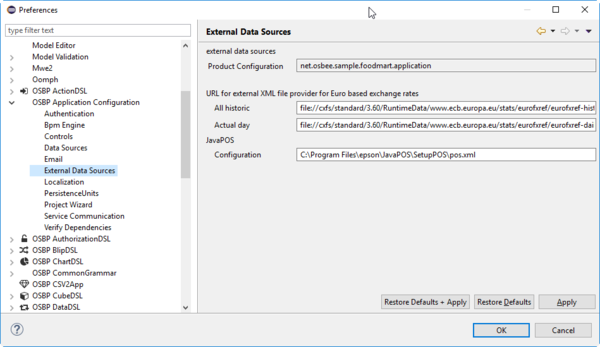
* In the tab External Data Sources put the noted path in the field JavaPOS Configuration | * In the tab External Data Sources put the noted path in the field JavaPOS Configuration | ||
| − | [[File:ProductConfiguration2. | + | [[File:ProductConfiguration2.png|600px]]<br><br> |
Revision as of 14:13, 26 April 2017
Epson Cash Register Peripherals
If you want to work with Epson-Seiko cash register peripherals some extra steps are necessary:
- Download and unzip the ADK from the following site: [1]
- You must pass a registration process on the Epson site
- Install the ADK
- From the start menu launch SetupPos and configure the physical hardware according to the Epson manuals
- Save the configuration and note the path to the configuration file
- In Eclipse open Window->Preferences->OSBP Application Configuration
- Select the product to be configured in the field Product Configuration
- In the tab External Data Sources put the noted path in the field JavaPOS Configuration


