Difference between revisions of "My first app"
(→License information) |
(→How to generate MyFirstApp) |
||
| Line 25: | Line 25: | ||
MyFirstApp is generated from within Eclipse.<br><br> | MyFirstApp is generated from within Eclipse.<br><br> | ||
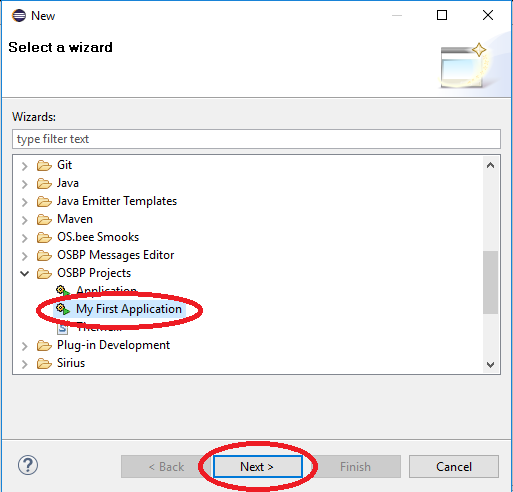
| − | # In Project Explorer, right click the mouse, then select New -> Other.<br><br>[[File: | + | # In Project Explorer, right click the mouse, then select New -> Other.<br><br>[[File:MyFirstApp01.png]]<br><br><br><br> |
| − | # Select OSBP Projects -> My First App and then click on '''Next'''.<br><br>[[File: | + | # Select OSBP Projects -> My First App and then click on '''Next'''.<br><br>[[File:MyFirstApp02.png]]<br><br><br><br> |
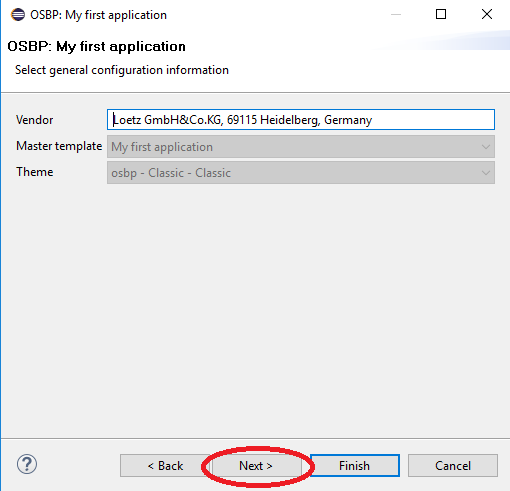
| − | # Now you see the general configuration window for MyFirstApp.<br><br>[[File: | + | # Now you see the general configuration window for MyFirstApp.<br><br>[[File:MyFirstApp03.png]]<br><br><br><br> |
#* Click on '''Next'''.<br><br><br><br> | #* Click on '''Next'''.<br><br><br><br> | ||
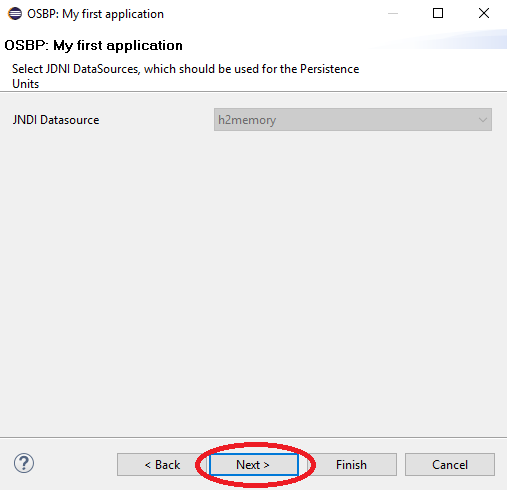
# The JDNI Data Source can be set up on this page. Click '''Next''' when done.<br><br> | # The JDNI Data Source can be set up on this page. Click '''Next''' when done.<br><br> | ||
#* The default value is h2memory, which saves all data in memory.<br><br> | #* The default value is h2memory, which saves all data in memory.<br><br> | ||
| − | #* If you want to use a different JDNI Data Source, e.g., MySQL or Oracle, you can change it later.<br><br>[[File: | + | #* If you want to use a different JDNI Data Source, e.g., MySQL or Oracle, you can change it later.<br><br>[[File:MyFirstApp04.png]]<br><br><br><br> |
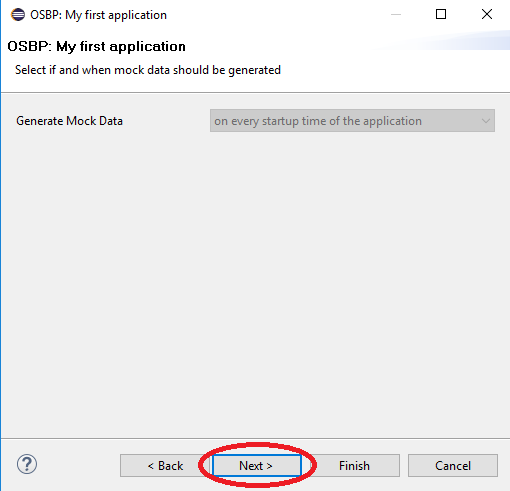
| − | # Setup for the mock-data generation. Click on '''Next'''.<br><br>[[File: | + | # Setup for the mock-data generation. Click on '''Next'''.<br><br>[[File:MyFirstApp05.png]]<br><br><br><br> |
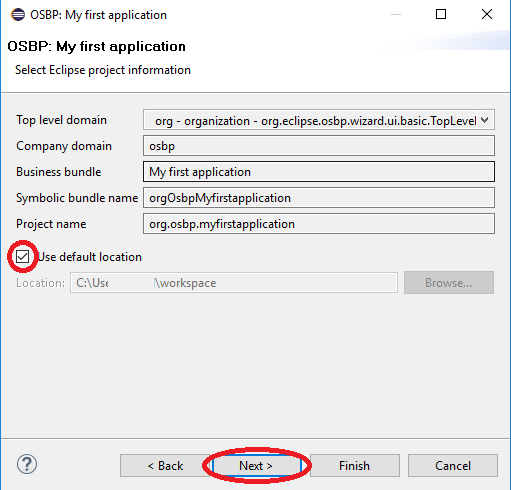
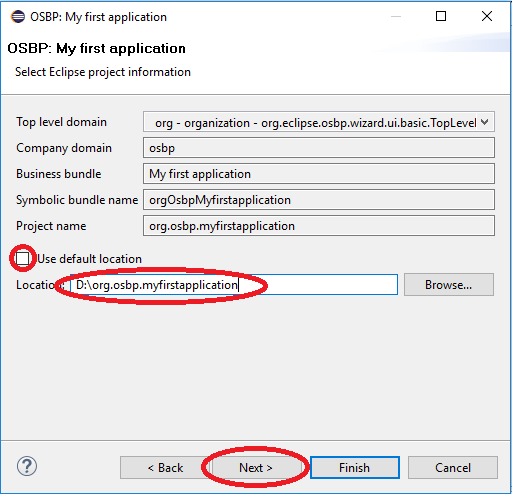
# Choose the location where you would like to save the files of MyFirstApp.<br><br> | # Choose the location where you would like to save the files of MyFirstApp.<br><br> | ||
| − | #* You can use the default location:<br><br>[[File: | + | #* You can use the default location:<br><br>[[File:MyFirstApp06.png]]<br><br><br><br> |
| − | #* Or you can specify your own folder by unchecking the checkbox:<br><br>[[File: | + | #* Or you can specify your own folder by unchecking the checkbox:<br><br>[[File:MyFirstApp07.png]]<br><br><br><br> |
#* Click on '''Next''' when done.<br><br><br> | #* Click on '''Next''' when done.<br><br><br> | ||
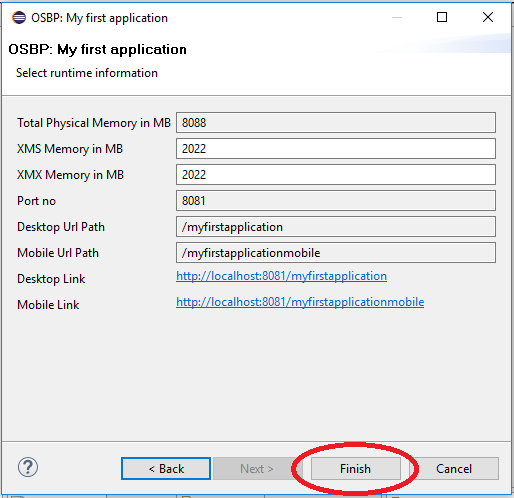
| − | # The XMS Memory is usually ¼ of total physical memory. The desktop link which will be used later to start the application can also be found here.<br><br>[[File: | + | # The XMS Memory is usually ¼ of total physical memory. The desktop link which will be used later to start the application can also be found here.<br><br>[[File:MyFirstApp08.png]]<br><br><br><br> |
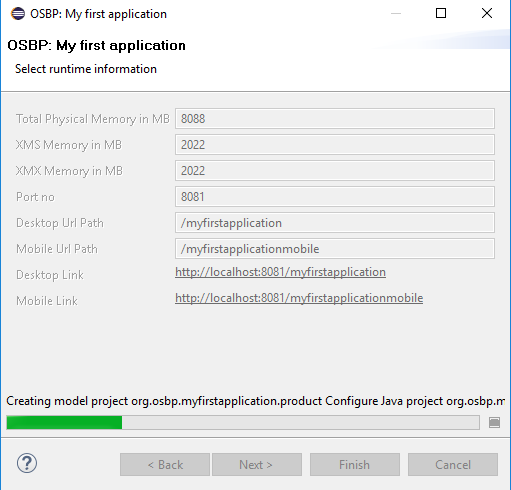
| − | #* Click on '''Finish''' to start the generation step.<br><br>[[File: | + | #* Click on '''Finish''' to start the generation step.<br><br>[[File:MyFirstApp09.png]]<br><br><br><br> |
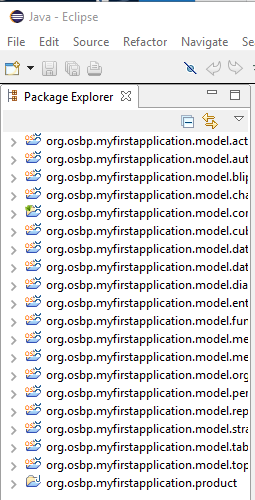
| − | # When the window disappears, you can see in Project Explorer that all projects of MyFirstApp have been generated.<br><br>[[File: | + | # When the window disappears, you can see in Project Explorer that all projects of MyFirstApp have been generated.<br><br>[[File:MyFirstApp10.png]]<br><br><br><br> |
#* Please note that up until this point, the application has not yet been completely generated. Typically, the workspace is still being built (see the bottom right corner of the window). Wait until this process has completed.<br><br>[[File:Mfa 05 inst bw.png]]<br><br><br><br> | #* Please note that up until this point, the application has not yet been completely generated. Typically, the workspace is still being built (see the bottom right corner of the window). Wait until this process has completed.<br><br>[[File:Mfa 05 inst bw.png]]<br><br><br><br> | ||
| − | # When the <code>Building Workspace</code> message disappears, the generation of MyFirstApp is complete. Project Explorer should now look like this:<br><br>[[File: | + | # When the <code>Building Workspace</code> message disappears, the generation of MyFirstApp is complete. Project Explorer should now look like this:<br><br>[[File:MyFirstApp11.png]]<br><br><br><br> |
== How to start MyFirstApp == | == How to start MyFirstApp == | ||
Revision as of 14:00, 13 April 2017
Contents
General information
Abstract
MyFirstApp is an OSBP application created purely from models, based on OS.bee Software Factory.
If you want to have a basis on which you can explore OS.bee this is a good starting point. You can try to modify models and see the resulting changes. The models show everything from persistence up to the UI and demonstrate a lot of the stunning features and simplicity of MDSD with OS.bee.
The requirements, app generation steps, guiding of start the app, tips of configuration are written in this introduction.
Copyright Notice
All rights are reserved by Compex Systemhaus GmbH. In particular, duplications, translations, microfilming, saving and processing in electronic systems are protected by copyright. Use of this manual is only authorized with the permission of Compex Systemhaus GmbH. Infringements of the law shall be punished in accordance with civil and penal laws. We have taken utmost care in putting together texts and images. Nevertheless, the possibility of errors cannot be completely ruled out. The Figures and information in this manual are only given as approximations unless expressly indicated as binding. Amendments to the manual due to amendments to the standard software remain reserved. Please note that the latest amendments to the manual can be accessed through our helpdesk at any time. The contractually agreed regulations of the licensing and maintenance of the standard software shall apply with regard to liability for any errors in the documentation. Guarantees, particularly guarantees of quality or durability can only be assumed for the manual insofar as its quality or durability are expressly stipulated as guaranteed. If you would like to make a suggestion, the Compex Team would be very pleased to hear from you.
(c) 2016-2024 Compex Systemhaus GmbH
License information
The OS.bee Software Factory is distributed under a commercial license.
The product itself is based on the OSBP Software Factory which is an Eclipse project. In addition, the software depends on several other open source projects, and the entire list of licenses used can be found here.
Requirements
Please install the OS.bee Software Factory first. Instructions for the installation can be found here.
How to generate MyFirstApp
MyFirstApp is generated from within Eclipse.
- In Project Explorer, right click the mouse, then select New -> Other.

- Select OSBP Projects -> My First App and then click on Next.
- Now you see the general configuration window for MyFirstApp.
- Click on Next.
- Click on Next.
- The JDNI Data Source can be set up on this page. Click Next when done.
- The default value is h2memory, which saves all data in memory.
- If you want to use a different JDNI Data Source, e.g., MySQL or Oracle, you can change it later.
- The default value is h2memory, which saves all data in memory.
- Setup for the mock-data generation. Click on Next.
- Choose the location where you would like to save the files of MyFirstApp.
- You can use the default location:
- Or you can specify your own folder by unchecking the checkbox:
- Click on Next when done.
- You can use the default location:
- The XMS Memory is usually ¼ of total physical memory. The desktop link which will be used later to start the application can also be found here.
- Click on Finish to start the generation step.
- Click on Finish to start the generation step.
- When the window disappears, you can see in Project Explorer that all projects of MyFirstApp have been generated.
- Please note that up until this point, the application has not yet been completely generated. Typically, the workspace is still being built (see the bottom right corner of the window). Wait until this process has completed.

- Please note that up until this point, the application has not yet been completely generated. Typically, the workspace is still being built (see the bottom right corner of the window). Wait until this process has completed.
- When the
Building Workspacemessage disappears, the generation of MyFirstApp is complete. Project Explorer should now look like this: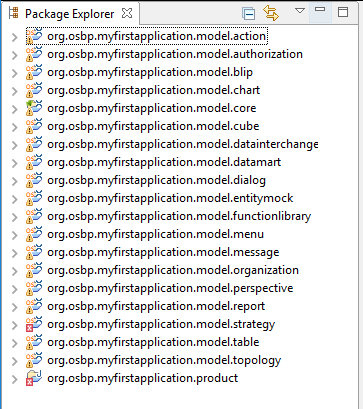


How to start MyFirstApp
- Now we are ready to start MyFirstApp.
- If you want to change any settings before starting the application, please see: How to configure MyFirstApp.
Launch Eclipse Application
- Open the file myfirstapp.product contained in the org.osbp.myfirstapp.product project.
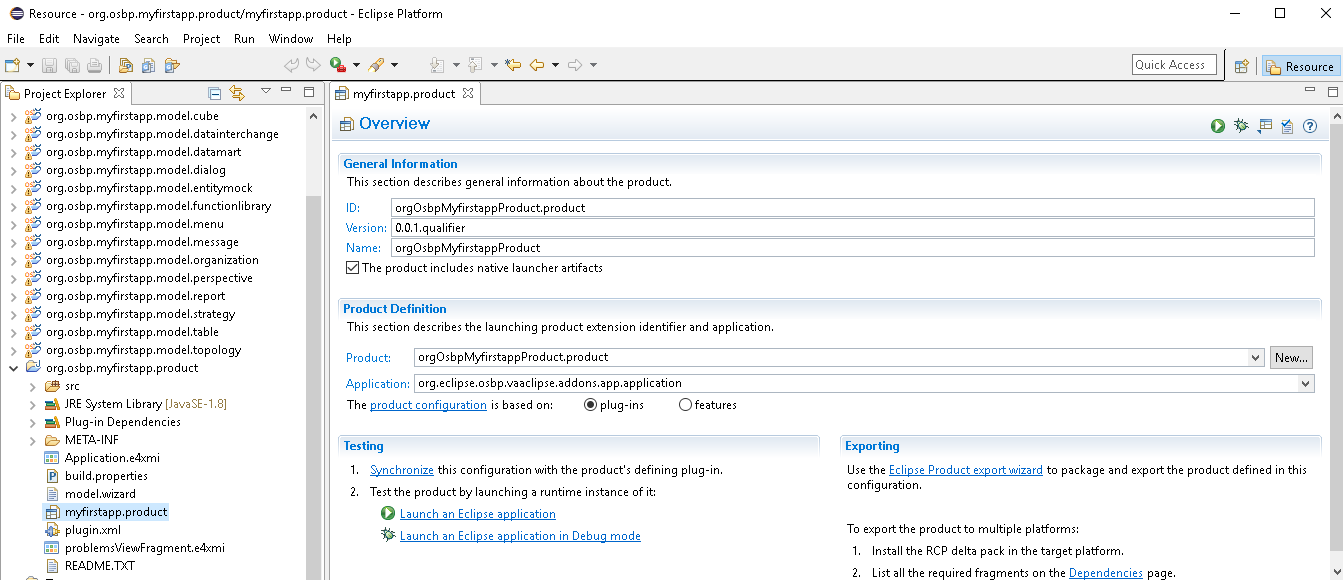
- First, the product definition should be validated. Please click the button at the top right.
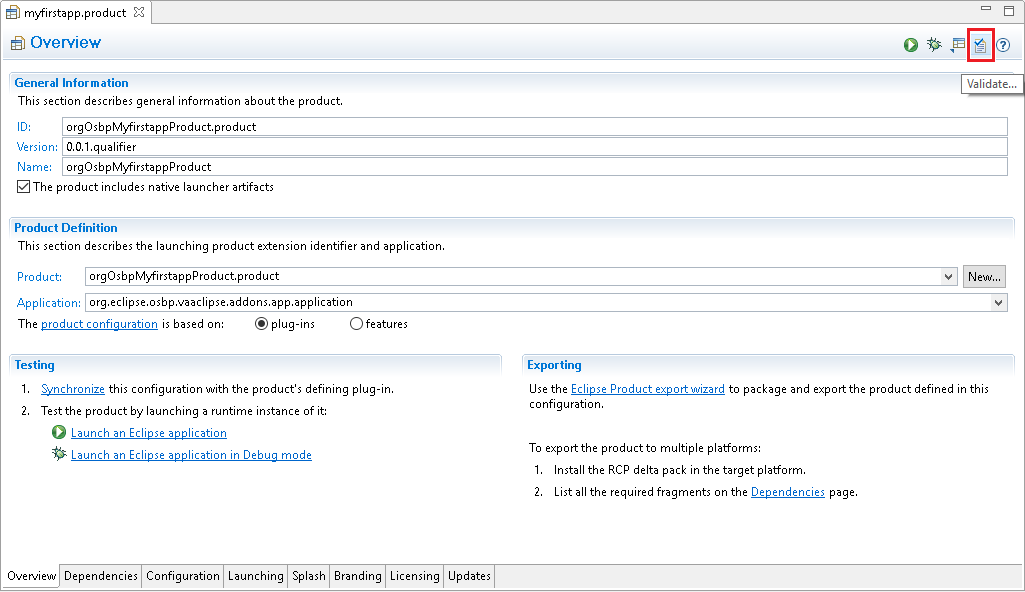
- If no problems were detected, click on OK. Otherwise, fix the problem first.


- Now, click on Launch an Eclipse application to start MyFirstApp.

- While the application is being launched, open the Console view to monitor the progress. One of the last lines displayed should end with the phrase
TRIGGER DONE....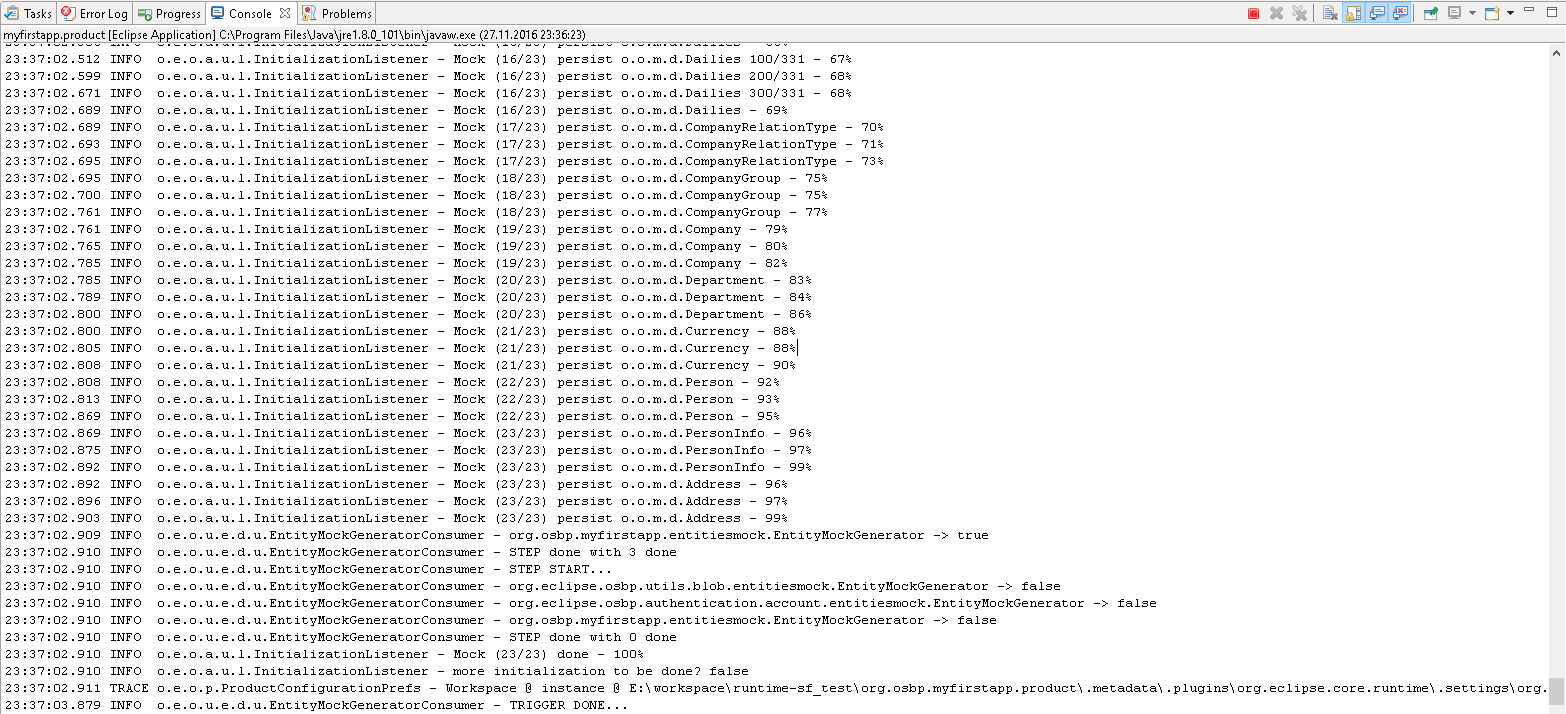


Start MyFirstApp in Browser
To start MyFirstApp, point your browser to this address:http://localhost:8081/myfirstapp
- Login
- The login screen will appear first.
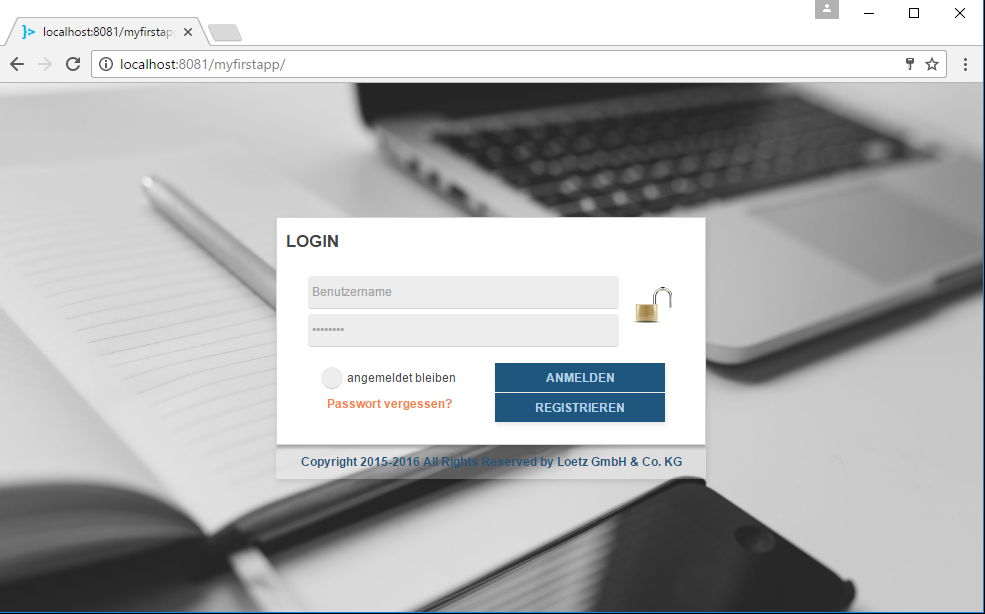
- Enter the user name and password, e.g., Admin, Admin, then click on Login to continue.
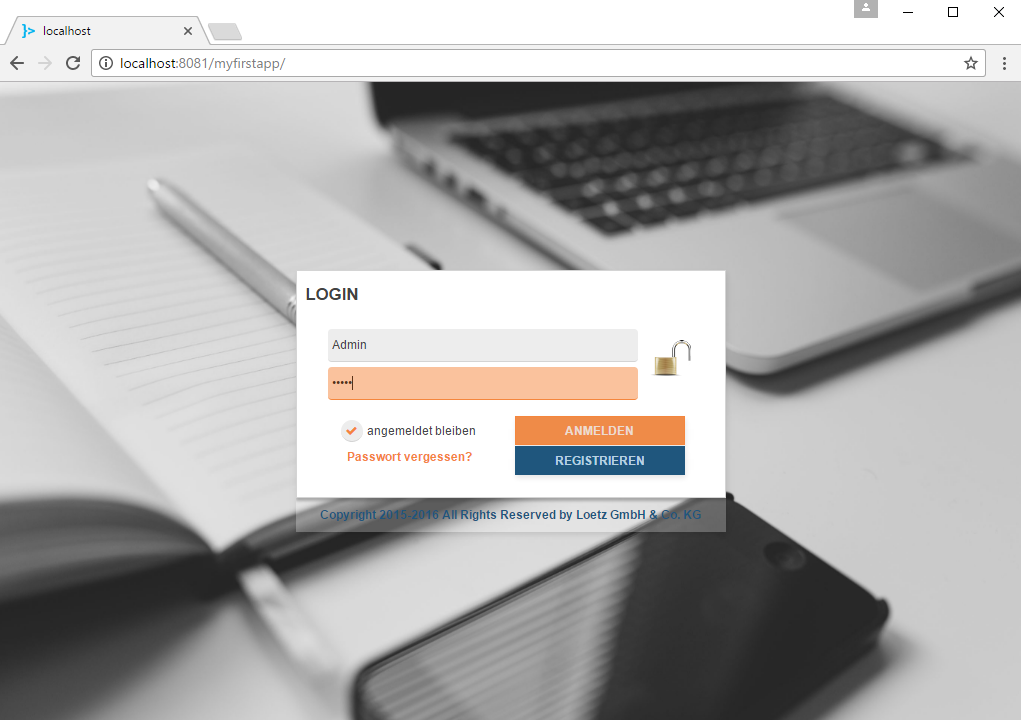
- The login screen will appear first.
- Welcome screen
- Now the welcome screen appears.
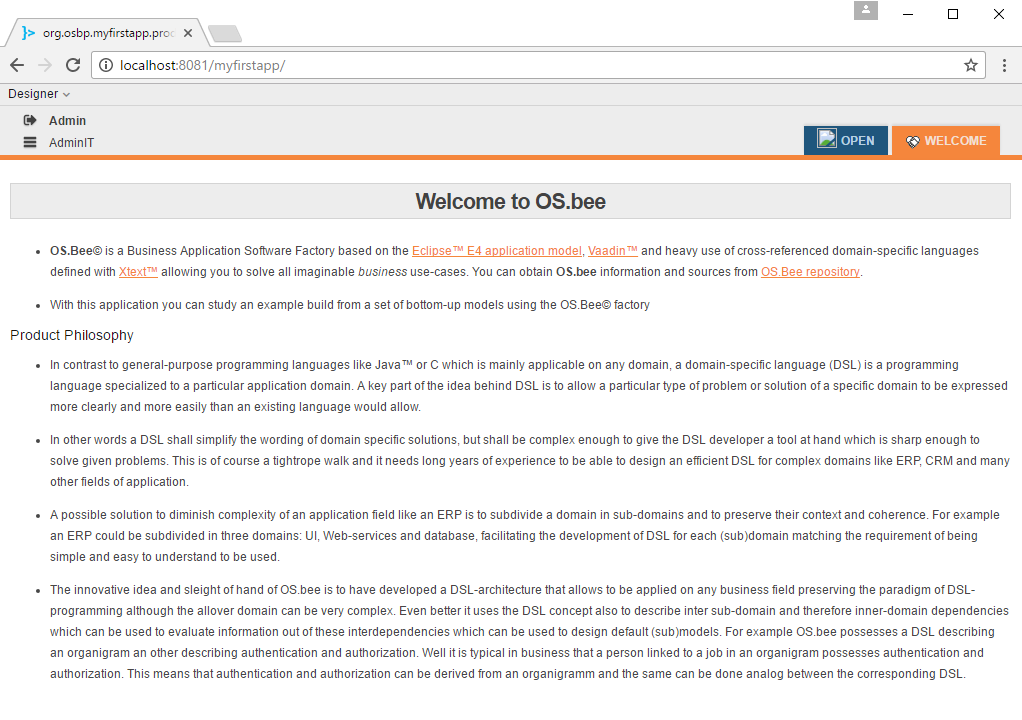
- Now the welcome screen appears.
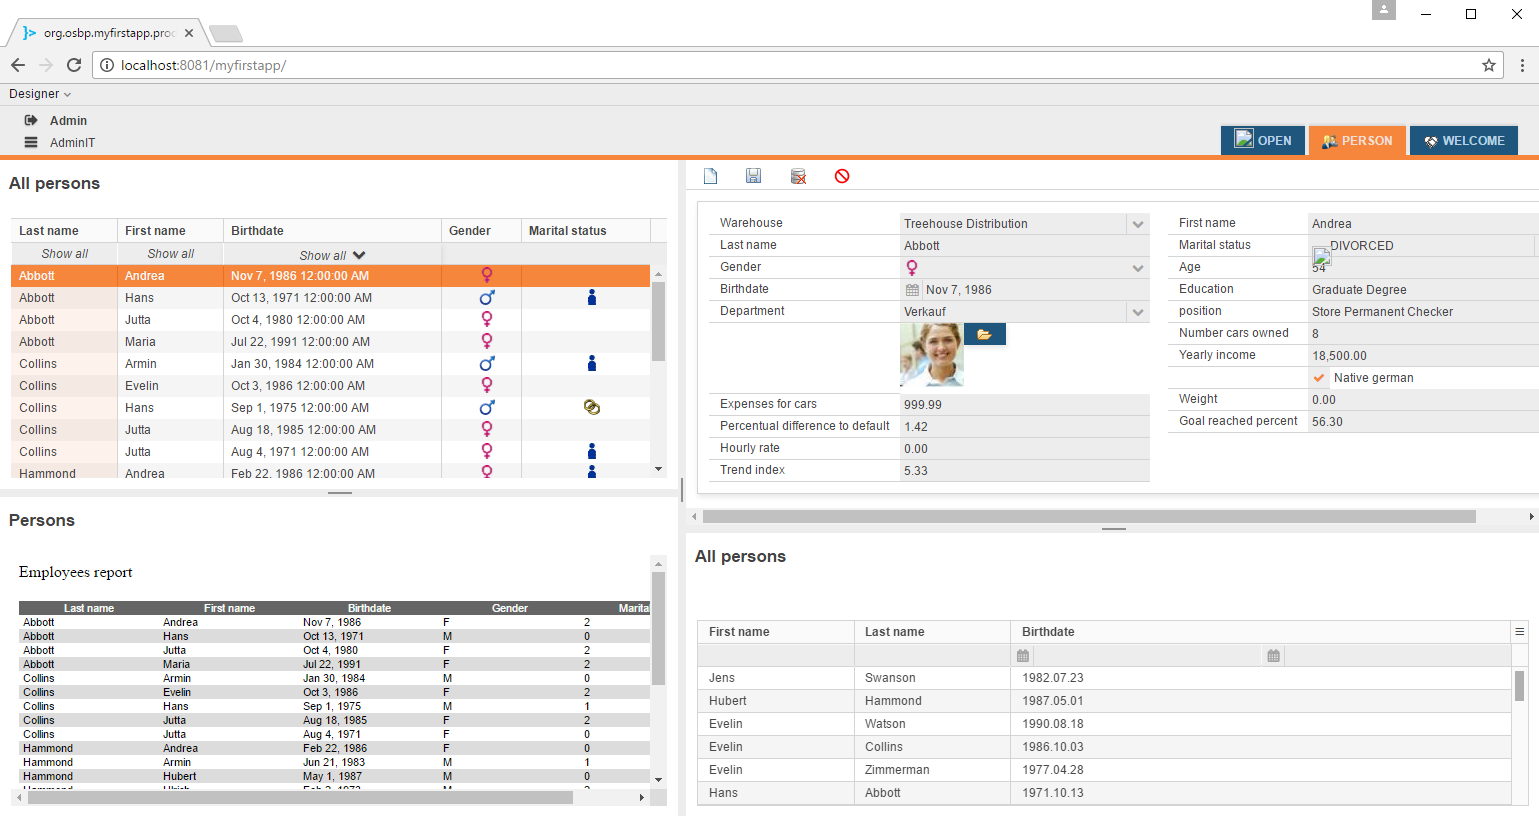
- Menu list
- At the top left of the window, just beside
AdminIT, is the MENU button. Click it to pop open the menu. - There are two main menus: Menu and Persons.
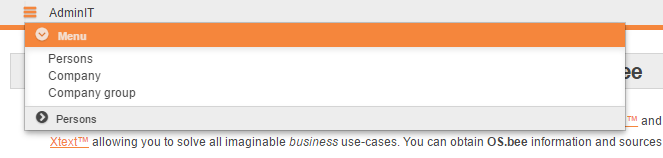
- Menu
- There are three submenus under Menu:
- Persons:
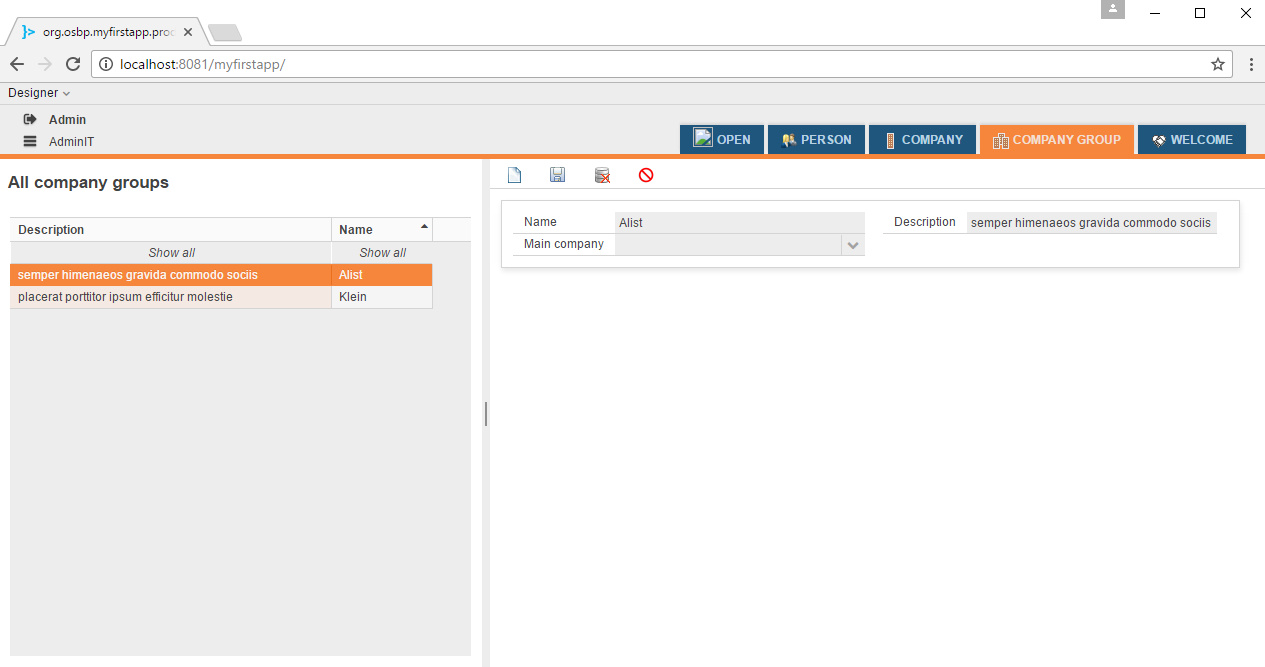
- Company:

- Company group:
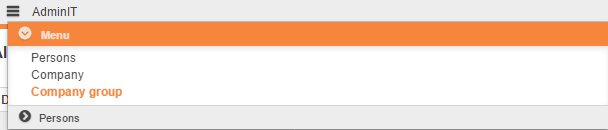
- Persons:
- There are three submenus under Menu:
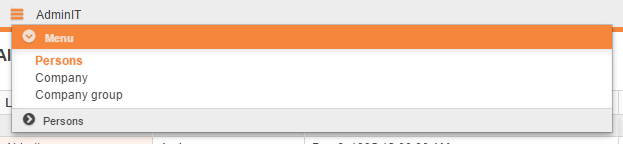
- Persons
- Click on the Persons entry, the table
All personswill appear directly in the menu list.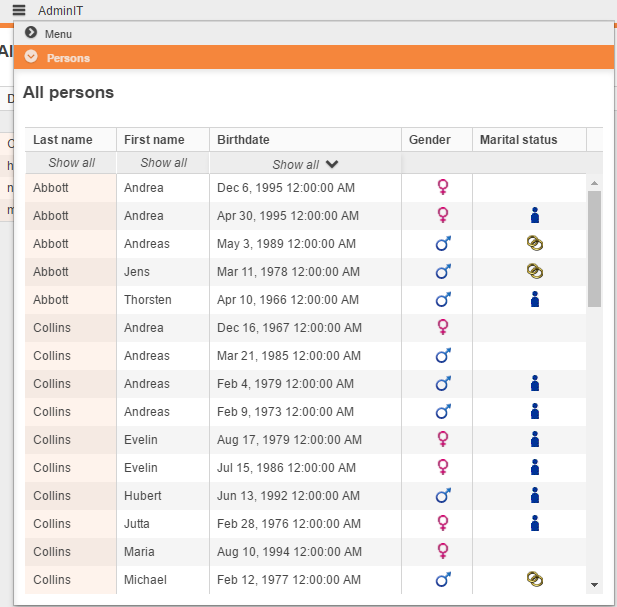
- Click on the Persons entry, the table
- At the top left of the window, just beside
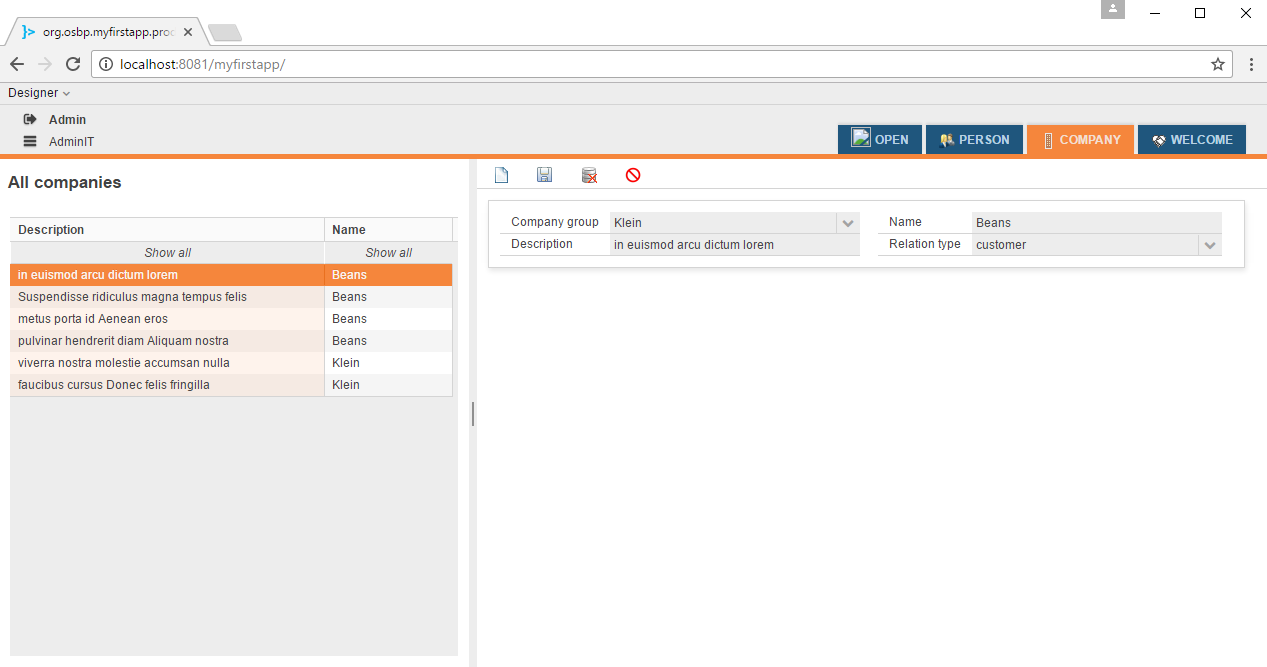
- Tab list
- At the top right of the window, there are some tabs. By clicking on them, you can easily switch between pages.
- At the top right of the window, there are some tabs. By clicking on them, you can easily switch between pages.


How to configure MyFirstApp
This part is optional, since MyFirstApp can be started without additional configuration. If you want to change the default settings, however, please continue reading.
- All configuration is performed within Eclipse.
Select OSBP Application Project
- The first step of the configuration is to change the Product Configuration from
workspacetoorg.osbp.myfirstapp.productin Preferences -> OSBP Application Configuration. Please note that this entry is not saved. You must repeat this step each time you wish to configure MyFirstApp.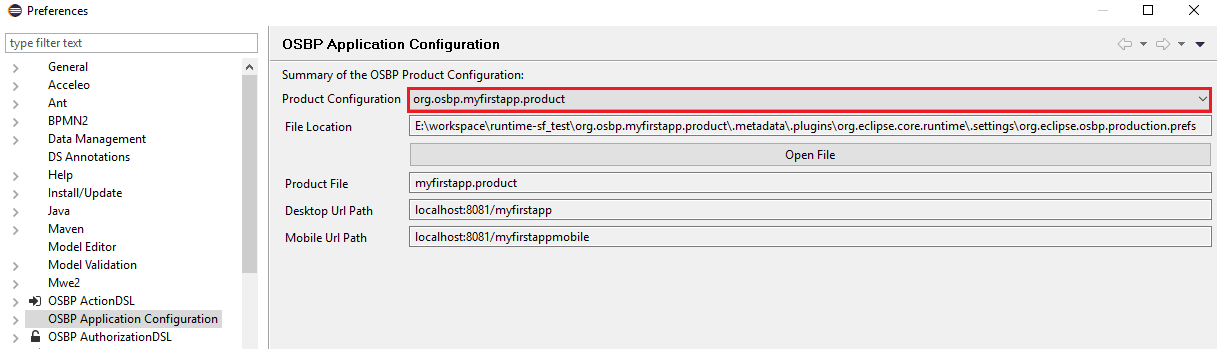

- The Desktop URL Path is:
http://localhost:8081/myfirstapp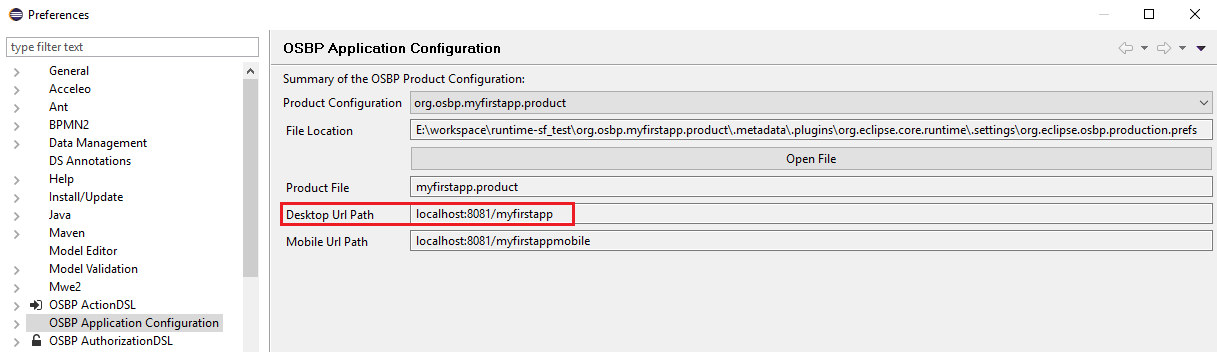

Detail Configuration
Click on the > before OSBP Application Configuration to extend the tree.
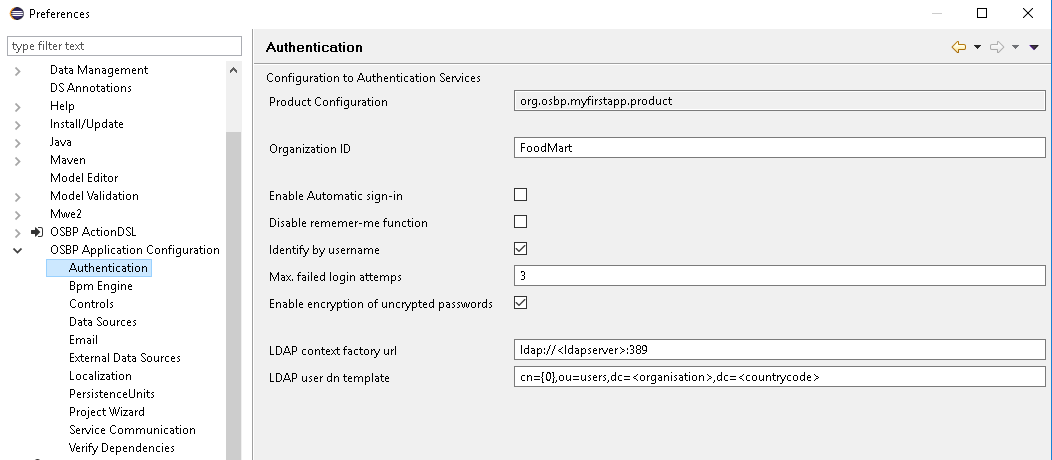
- Configure Authentication.
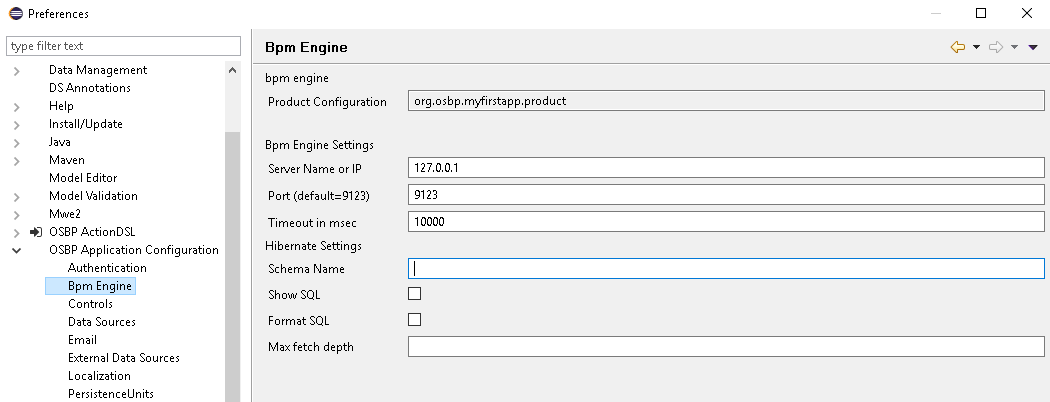
- Configure Bpm Engine.
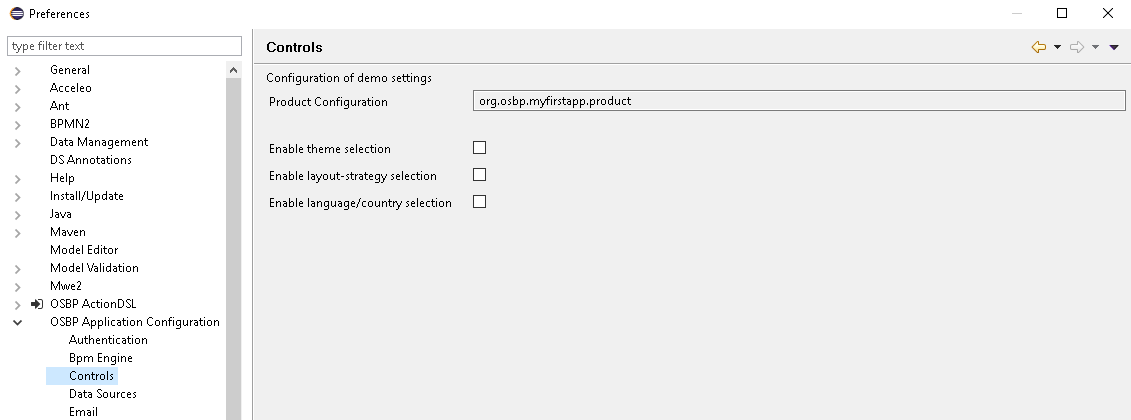
- Configure Controls.
- Configure Data Sources.
- All data sources can be set up here:
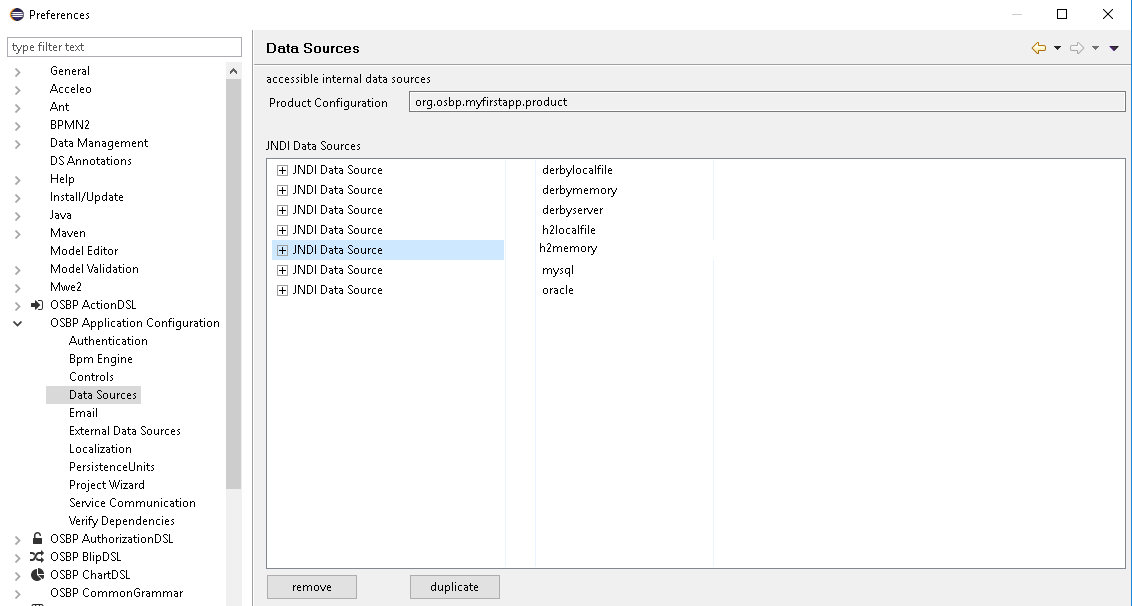
- If you want to use other data sources, please configure them first. Click
+to extend the tree, and then enter all necessary information, e.g. Server Name, Server Port, Database Name, etc.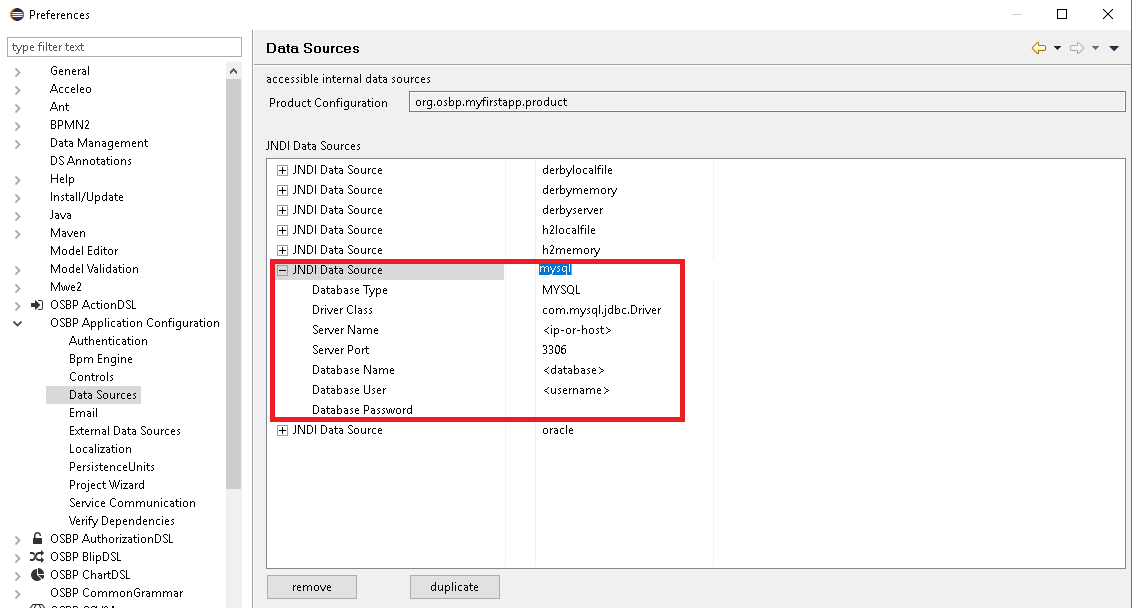
- All data sources can be set up here:
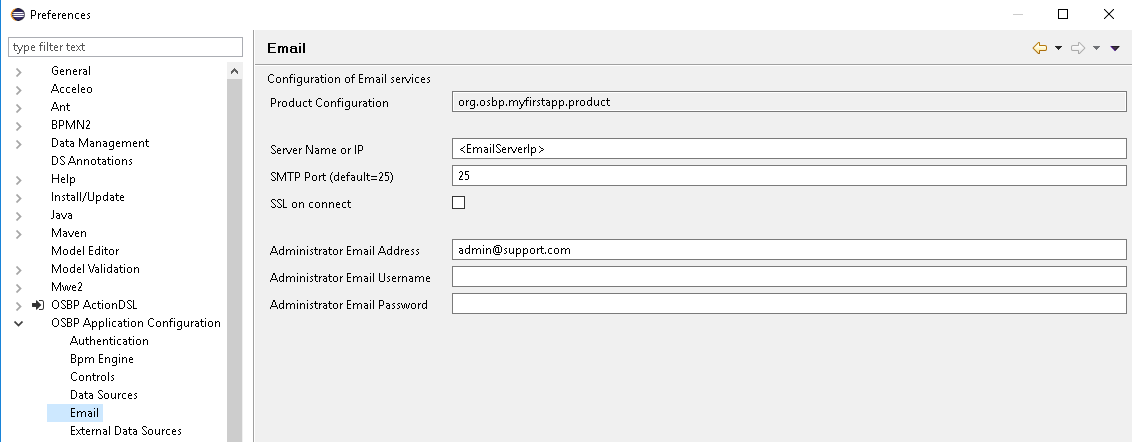
- Configure Email.
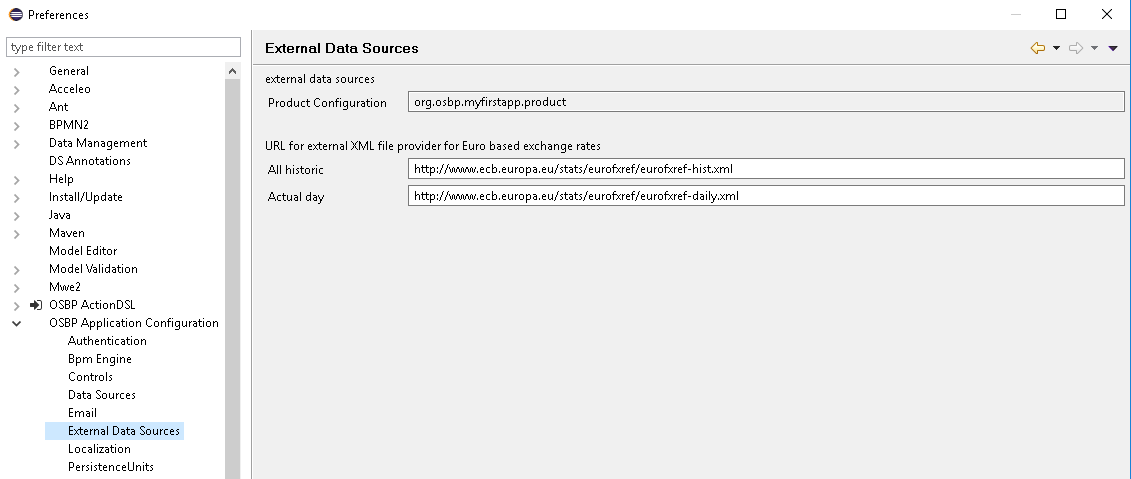
- Configure External Data Sources.
- Configure Localization.
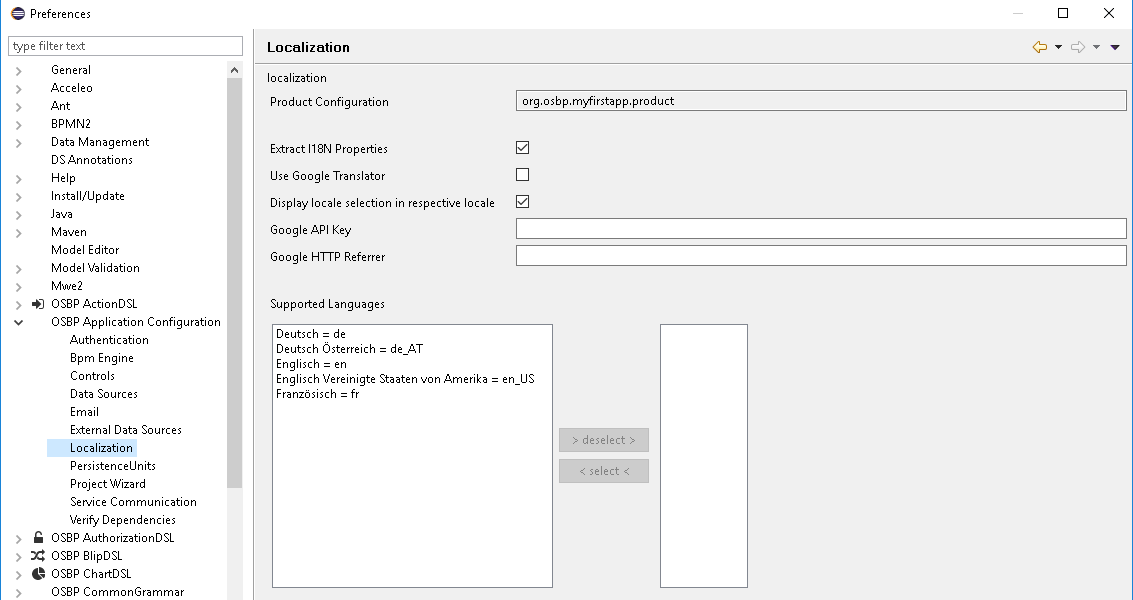
- Configure PersistenceUnits.
- All details about Persistence Units can be changed here.
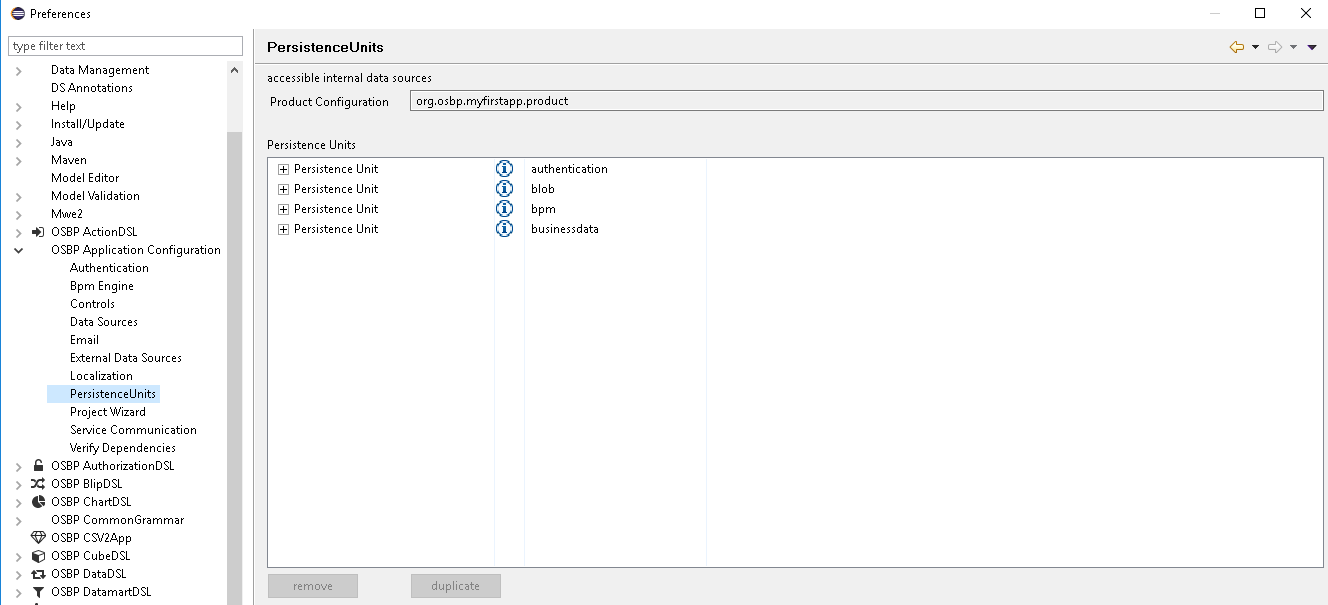
- Click
+to extend the tree, and you can then change data source, DDL Generation, etc.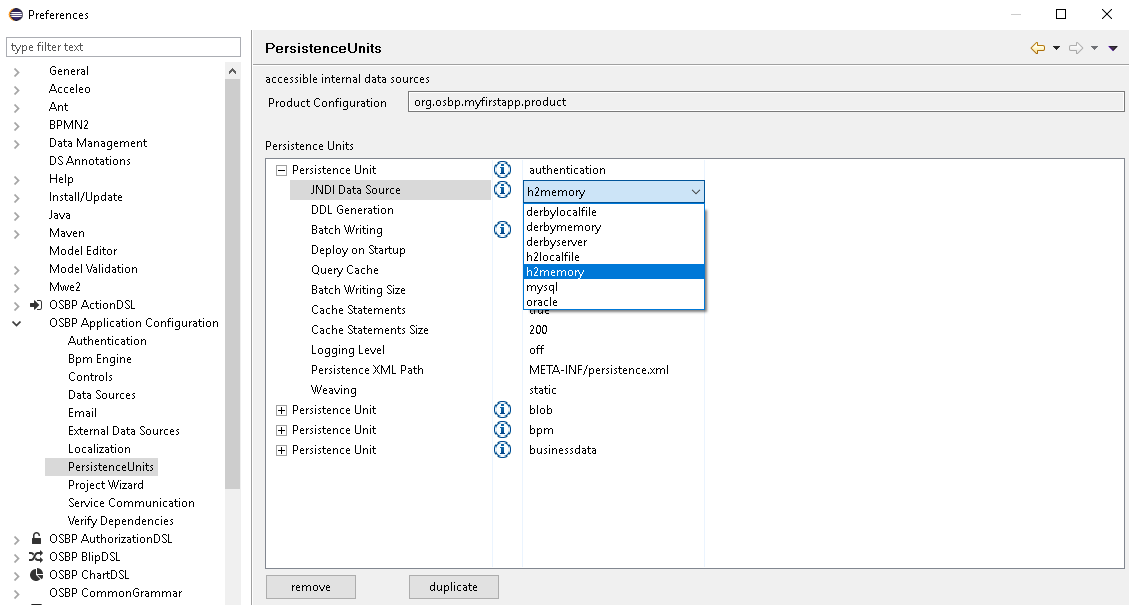
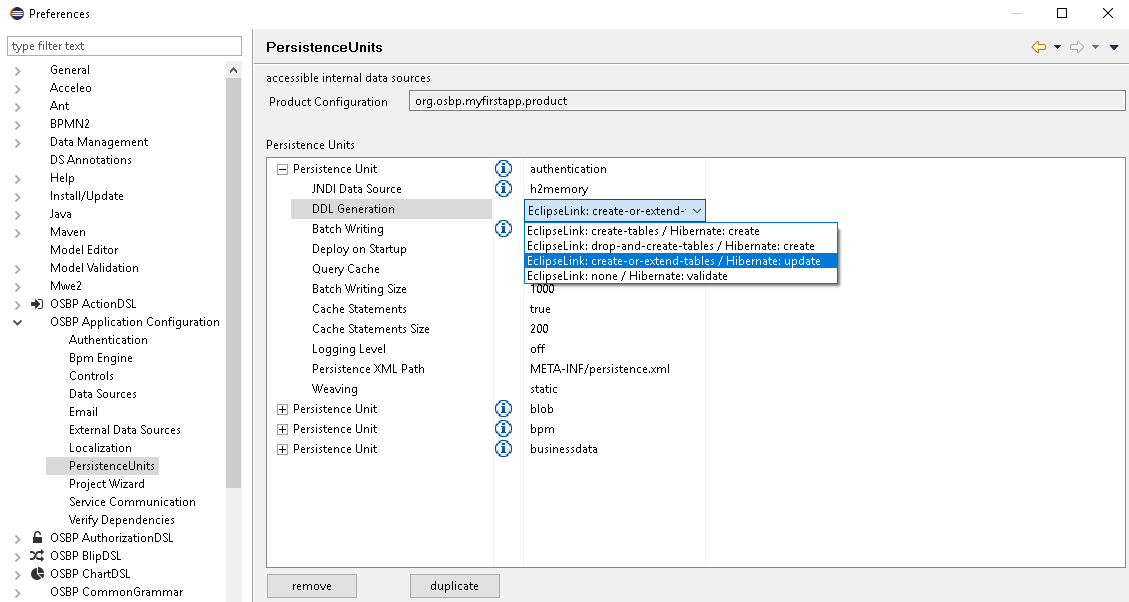
- All details about Persistence Units can be changed here.
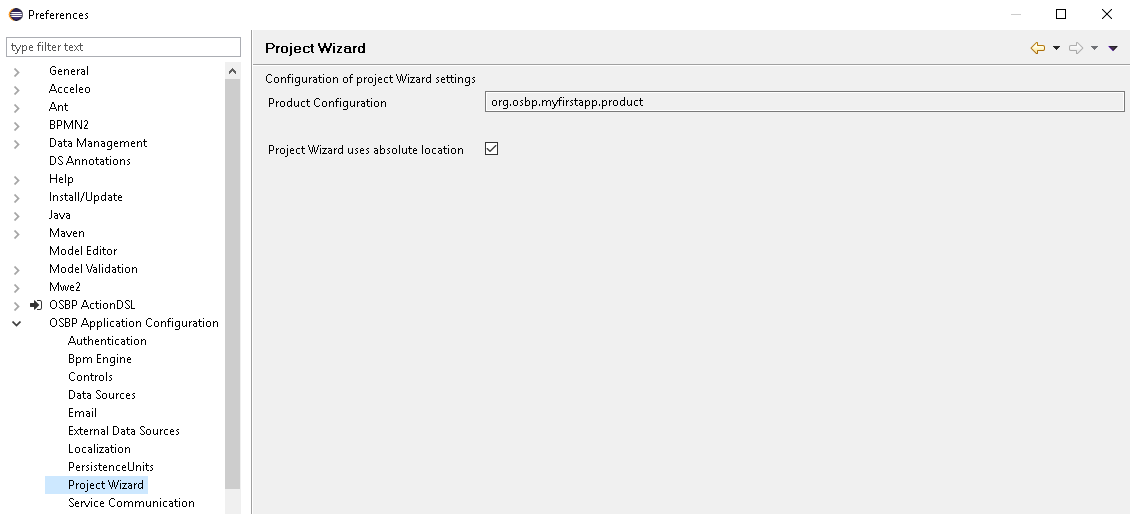
- Configure Project Wizard.
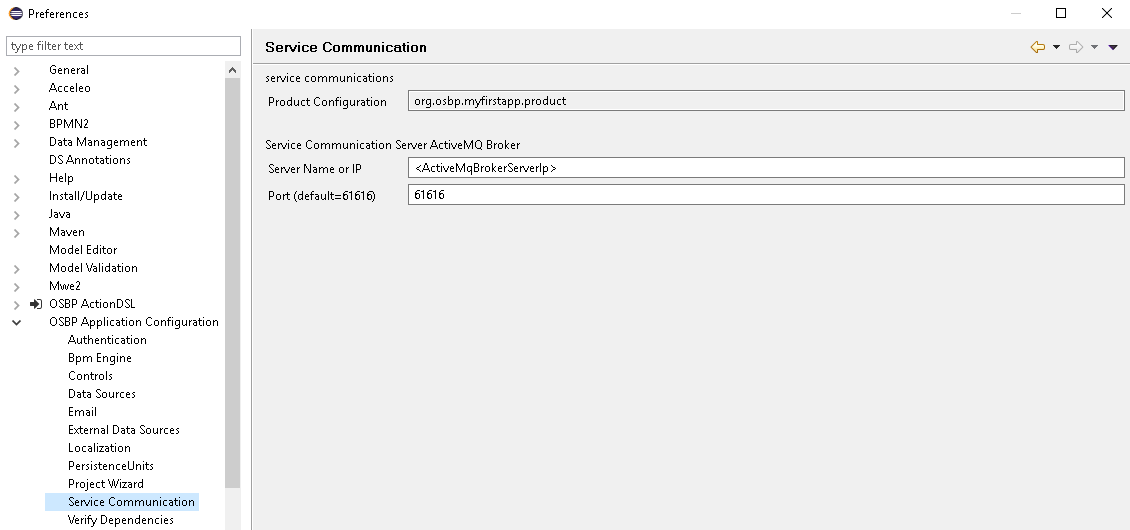
- Configure Service Communication.
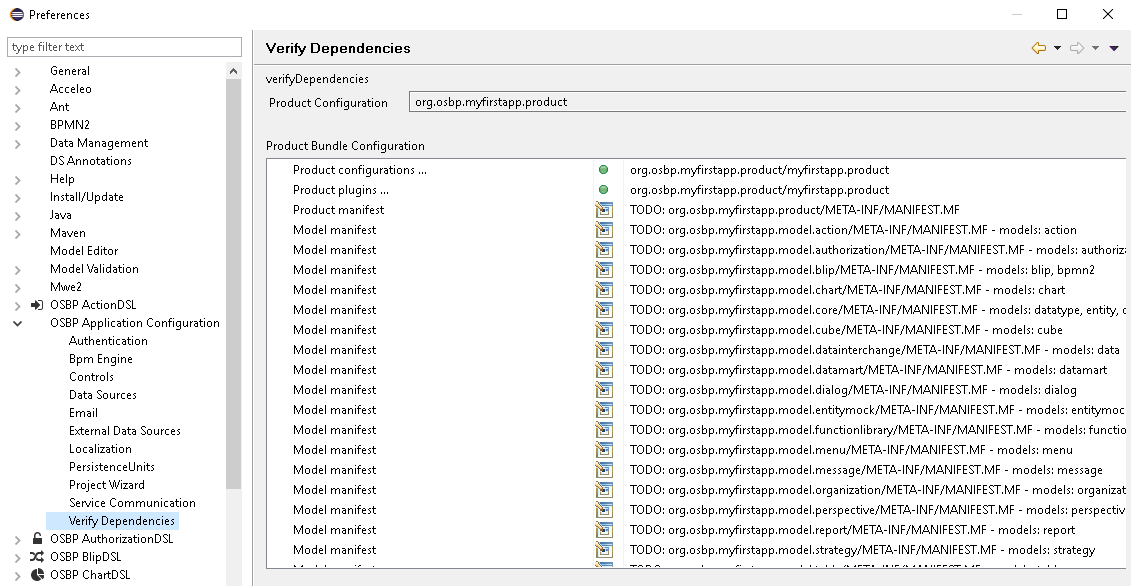
- Configure Verify Dependencies.
- If you see all green points, it means MyFirstApp is ready to start without any dependency errors. If you see any red points, fix the errors before starting.
- If you see all green points, it means MyFirstApp is ready to start without any dependency errors. If you see any red points, fix the errors before starting.


