Difference between revisions of "OS.bee Software Factory Installation Luna"
(→Installation) |
(→Installation) |
||
| Line 70: | Line 70: | ||
- Copy the appropriate link to the repository into '''Work with:''' | - Copy the appropriate link to the repository into '''Work with:''' | ||
| − | [[File:Setup. | + | [[File:Setup.png]] |
- Select the "OS.bee Softwarefactory EE", confirm the upcoming dialogues and wait for the installation to be finished. | - Select the "OS.bee Softwarefactory EE", confirm the upcoming dialogues and wait for the installation to be finished. | ||
Revision as of 08:36, 4 August 2016
Contents
General information
Java Version
To be able to use the OS.bee Softwarefactory you need to install the right Java version.
On Windows, this is Java JDK 8 64bit Java SE Downloads.
In case you need to use several Java versions on your system, see additional information in [#InstalltheOS.Additional Information Java versions]
Eclipse Version
To be able to use the OS.bee Softwarefactory you need to start with the right Eclipse version. You can use this one Eclipse Luna DSL Developers SR2. Download and extract it to a place you like.
Installation of the Software Factory
Install the OS.bee Software Factory
before you start
The following change in the eclipse.ini might help to avoid timeout problems with servers that respond slowly.
-Dorg.eclipse.ecf.provider.filetransfer.retrieve.closeTimeout=3000
-Dorg.eclipse.ecf.provider.filetransfer.retrieve.readTimeout=3000
And it will help to give the Eclipse a little more memory:
-Xmx4096m
A resulting eclipse.ini for a Windows installation might look like:
-startup
plugins/org.eclipse.equinox.launcher_1.3.0.v20140415-2008.jar
--launcher.library
plugins/org.eclipse.equinox.launcher.win32.win32.x86_64_1.1.200.v20150204-1316
-product
org.eclipse.epp.package.dsl.product
--launcher.defaultAction
openFile
--launcher.XXMaxPermSize
256M
-showsplash
org.eclipse.platform
--launcher.XXMaxPermSize
256m
--launcher.defaultAction
openFile
--launcher.appendVmargs
-vmargs
-Dosgi.requiredJavaVersion=1.6
-Dorg.eclipse.ecf.provider.filetransfer.retrieve.closeTimeout=3000
-Dorg.eclipse.ecf.provider.filetransfer.retrieve.readTimeout=3000
-Xms128m
-Xmx4096m
Links to the repositories
The links to the repositpries are available on the download page.
Installation
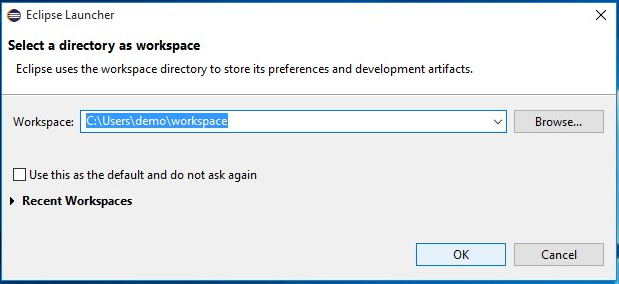
- Start the new Eclipse installation and select or define a workspace. Here too, it is important that each Eclipse installation is assigned its own workspace.

- Go to the menu bar and select Help -> Install New Software ... - Copy the appropriate link to the repository into Work with:
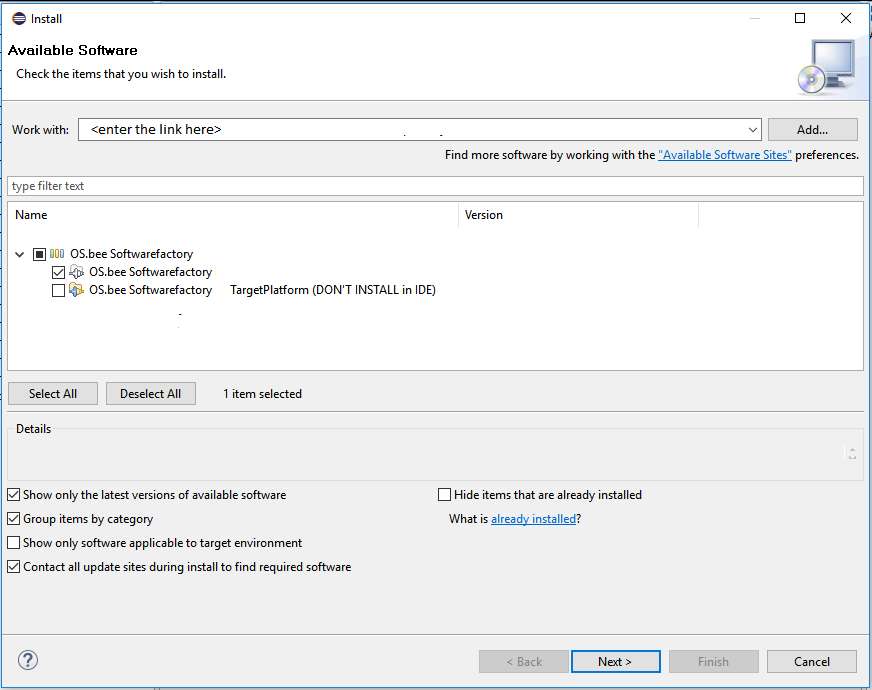

- Select the "OS.bee Softwarefactory EE", confirm the upcoming dialogues and wait for the installation to be finished.
- confirm the "software to be installed" dialog
- accept the terms of the license aggreement after you read them carefully and confirm the "Review licenses" dialog by pushing the "Finish" button:
Image(eclipse_installation_agree_to_licenses.PNG)
&action=edit&redlink=1)
- confirm the "Security Warning" dialog
Image(install_unsigned_code_warning.PNG)
&action=edit&redlink=1)
- You will then be prompted to restart Eclipse. Please do so!
Set Targetplatform for the OS.bee Softwarefactory EE
- Check the workspace you are using (see section [wiki:OsbeeInstallSWF#Installation Installation] above) - is it the one you want to use for the further processing? If not, open the right one.
You can add the parameter {{{-data <path/to/workspace}}} to a shortcut you use to start Eclipse. This will help using the right workspace in the future. It also removes the question about the workspace on Eclipse startup.
- Then set the targetplatform here: Menu -> Window -> Preferences -> Plug-in Development -> Target Platform
Image(targetplatform.png)
&action=edit&redlink=1)
- Add a new Target Definition or edit the existing entry.
Image(addnewtarget.png)
&action=edit&redlink=1)
- Then add conten, software site.
Image(addcontent.png)
&action=edit&redlink=1)
- Use the same link as above for the softwaresite. - Select OS.bee Softwarefactory EE Targetplatform (DON'T INSTALL...)
and uncheck the include required software checkbox.
Image(addcontent2.PNG)
&action=edit&redlink=1)
- Change in regsiter Content and deactivate the following bundles in the resulting target definition.
 {{{
  javax.annotation version 1.2
  javax.servlet    version 3.1  (may not be present)
 }}}
Image(addcontent3.png)
&action=edit&redlink=1)
Do not forget to activate your new created target definition!
... [Finish]
- Restart Eclipse
HEUREKA!