Difference between revisions of "OS.bee Software Factory Installation Luna"
(→Eclipse Version) |
(→Eclipse Version) |
||
| Line 38: | Line 38: | ||
The first line ensures that the required Java version is used. The second allocates extra memory for Eclipse to use and the last two help to avoid timeout problems with servers that respond slowly. | The first line ensures that the required Java version is used. The second allocates extra memory for Eclipse to use and the last two help to avoid timeout problems with servers that respond slowly. | ||
| − | A resulting '''eclipse.ini''' for a Windows installation might look like this:<br> | + | A resulting '''eclipse.ini''' file for a Windows installation might look like this:<br> |
-startup plugins/org.eclipse.equinox.launcher_1.3.0.v20140415-2008.jar | -startup plugins/org.eclipse.equinox.launcher_1.3.0.v20140415-2008.jar | ||
--launcher.library | --launcher.library | ||
Revision as of 22:24, 22 December 2016
Contents
General information
Copyright Notice
All rights are reserved by Compex Systemhaus GmbH. In particular, duplications, translations, microfilming, saving and processing in electronic systems are protected by copyright. Use of this manual is only authorized with the permission of Compex Systemhaus GmbH. Infringements of the law shall be punished in accordance with civil and penal laws. We have taken utmost care in putting together texts and images. Nevertheless, the possibility of errors cannot be completely ruled out. The Figures and information in this manual are only given as approximations unless expressly indicated as binding. Amendments to the manual due to amendments to the standard software remain reserved. Please note that the latest amendments to the manual can be accessed through our helpdesk at any time. The contractually agreed regulations of the licensing and maintenance of the standard software shall apply with regard to liability for any errors in the documentation. Guarantees, particularly guarantees of quality or durability can only be assumed for the manual insofar as its quality or durability are expressly stipulated as guaranteed. If you would like to make a suggestion, the Compex Team would be very pleased to hear from you.
(c) 2016-2024 Compex Systemhaus GmbH
License information
The OS.bee Software Factory is distributed under a commercial license.
The product itself is based on the OSBP Software Factory which is an Eclipse Project. In addition, the software depends on several other open source projects and the entire list of licenses used can be found here.
Installation of the Software Factory
Before you start
Java Version
To be able to use the OS.bee Software Factory you need to have the right Java version installed.
On Windows, this is Java JDK 8 64bit Java SE Downloads. If you have Java installed, there is generally a Java icon on the control panel which will enable you to find out the current version.
Eclipse Version
To be able to use the OS.bee Software Factory, you need to have the correct Eclipse version installed. You can use Eclipse Luna DSL Developers SR2. Download and extract it to a folder location of your choosing. On Windows, we recommend C:\. This results in the installation folder C:\eclipse. This will be the assumed Eclipse installation folder for the rest of this document.
To be able to launch Eclipse easily, create a shortcut to the program C:\eclipse\eclipse.exe on the computer's desktop . Be sure to add the parameter -data /path/to/your/workspace to the shortcut's invocation of Eclipse in order to start in the correct workspace in the future. Otherwise, you will be prompted to specify a workspace each time you start Eclipse.
Make the following additions / changes to the eclipse.ini file found in the C:\eclipse folder:
-Dosgi.requiredJavaVersion=1.8
-Xmx4096m
-Dorg.eclipse.ecf.provider.filetransfer.retrieve.closeTimeout=3000
-Dorg.eclipse.ecf.provider.filetransfer.retrieve.readTimeout=3000
The first line ensures that the required Java version is used. The second allocates extra memory for Eclipse to use and the last two help to avoid timeout problems with servers that respond slowly.
A resulting eclipse.ini file for a Windows installation might look like this:
-startup plugins/org.eclipse.equinox.launcher_1.3.0.v20140415-2008.jar
--launcher.library
plugins/org.eclipse.equinox.launcher.win32.win32.x86_64_1.1.200.v20150204-1316
-product org.eclipse.epp.package.dsl.product
--launcher.defaultAction
openFile
--launcher.XXMaxPermSize
256M
-showsplash
org.eclipse.platform
--launcher.XXMaxPermSize
256m
--launcher.defaultAction
openFile
--launcher.appendVmargs
-vmargs
-Dorg.eclipse.ecf.provider.filetransfer.retrieve.closeTimeout=3000
-Dorg.eclipse.ecf.provider.filetransfer.retrieve.readTimeout=3000
-Dosgi.requiredJavaVersion=1.8
-Xms128m
-Xmx4096m
OS.bee P2 Repository
You will need the link to the P2 repository later in the installation process.
The link to the repository is available on the download page.
Just accept the "Terms of Service and Use" on the download page, then click on the activated button for the software version you wish to use.

Then, click on "copy to clipboard" to store the URL for the P2 repository in the clipboard.

This URL is needed during the installation of the OS.bee Software Factory.
Installation of the OS.bee Software Factory
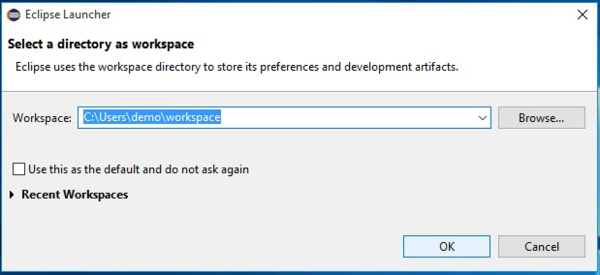
- Start the new Eclipse installation and select or define a workspace. It is important that each Eclipse installation is assigned to its own workspace.
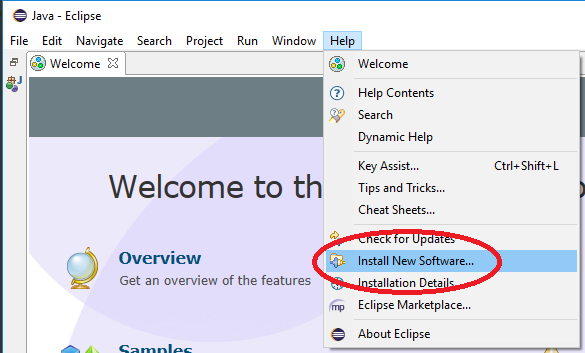
- Go to the menu bar and select Help -> Install New Software ...
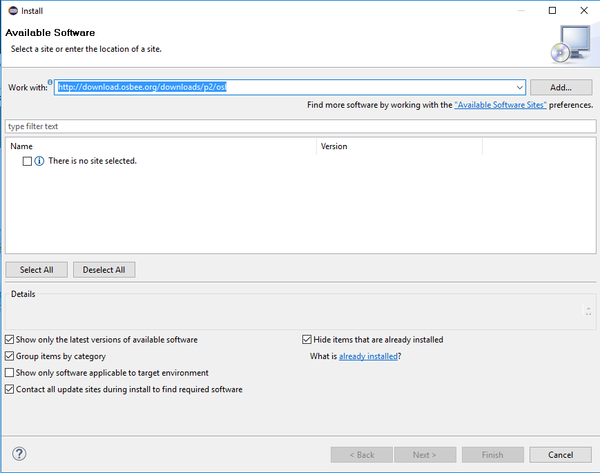
- Get the link to the repository from the download page and paste it into Work with:. Then press Enter to make Eclipse load the content of the repository
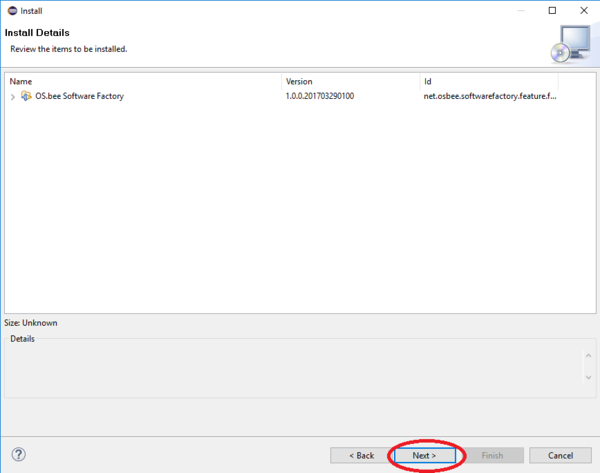
- Open the "OS.bee Software Factory" group, select the "OS.bee Software Factory", and click on next

- Confirm the "software to be installed" dialog by clicking on next
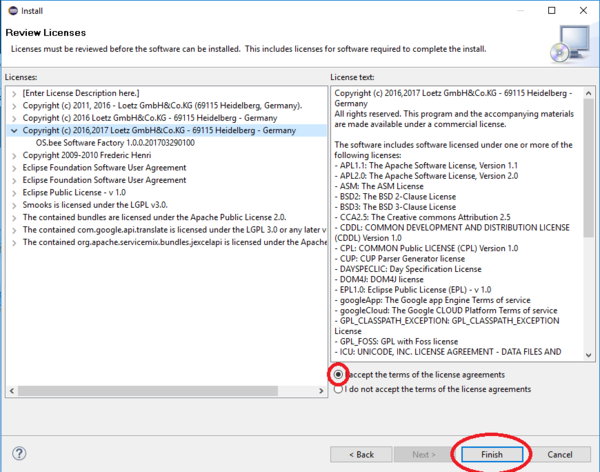
- Accept the terms of the license aggreement after you read them carefully and confirm the "Review licenses" dialog by pushing the Finish button:
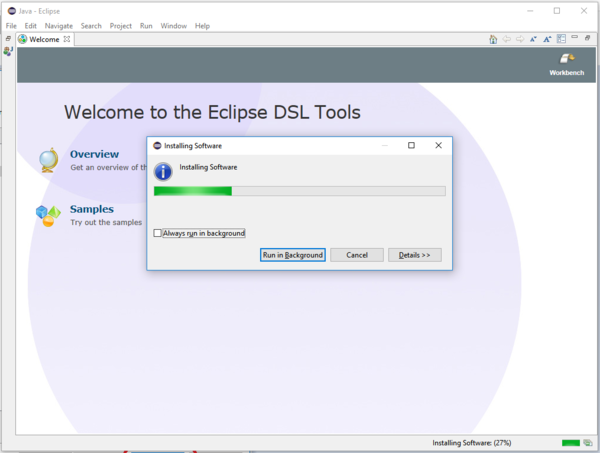
- The installation will now start. This may take a while depending on your internet connection speed
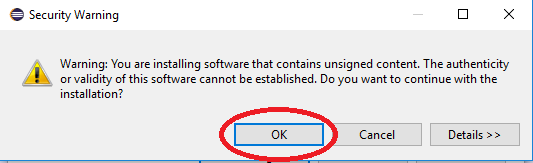
- After the software has been downloaded you have to confirm the "Security Warning" dialog by clicking OK
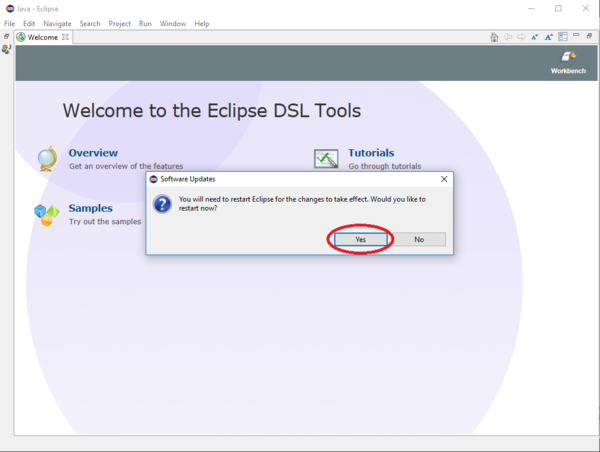
- You will then be prompted to restart Eclipse. Please do so!


Set Targetplatform for the OS.bee Software Factory
- Check if the workspace you are using is the one you selected above when first opening Eclipse. If not, open the right one.
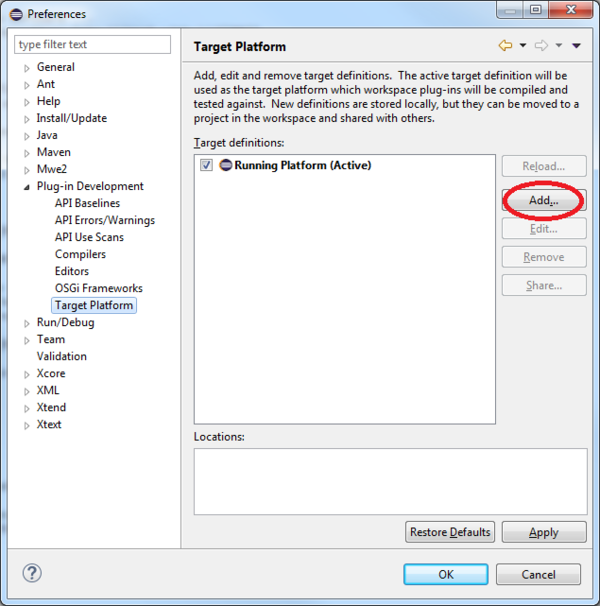
- Set the targetplatform here: Menu -> Window -> Preferences -> Plug-in Development -> Target Platform
- Add a new Target Definition
- Select "Default: ..." and click next

- Then add content, software site and click next.
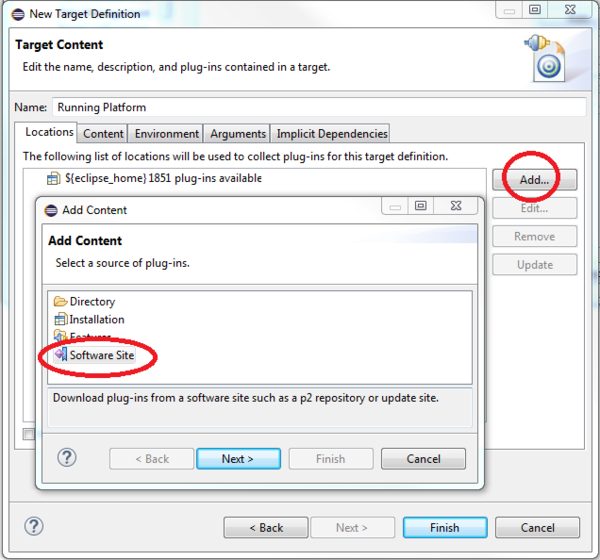
- Use the same link as above for the softwaresite.
- Open the group OS.bee Software Factory, select OS.bee Software Factory Targetplatform (DON'T INSTALL...),
uncheck the include required software checkbox and click Finish.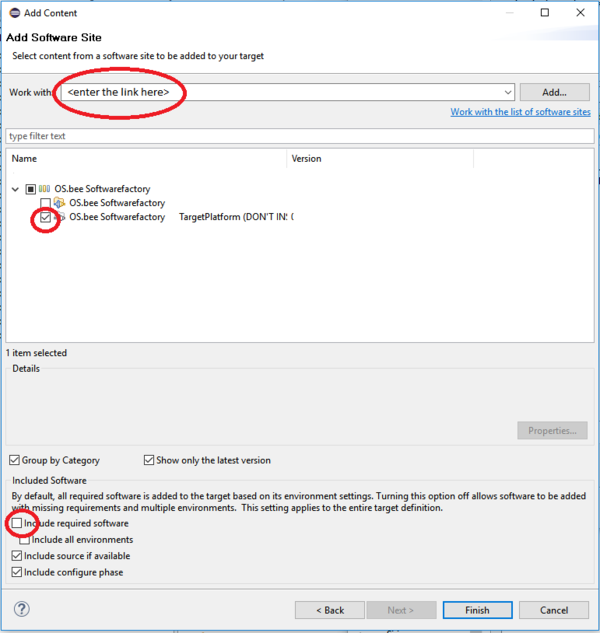
- Change in register Content, enter x.a in the filter and deactivate the following bundles in the resulting target definition.
javax.annotation version 1.2
javax.annotation.source version 1.2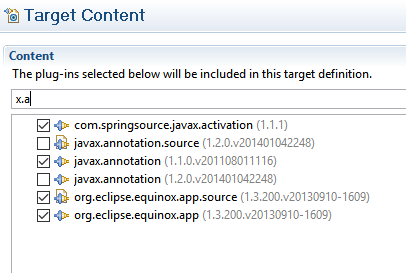
- Do not forget to activate your new created target definition!
- Restart Eclipse. You can use Menu->File->Restart to do so.


Now you can now continue with OS.bee Software Factory Samples